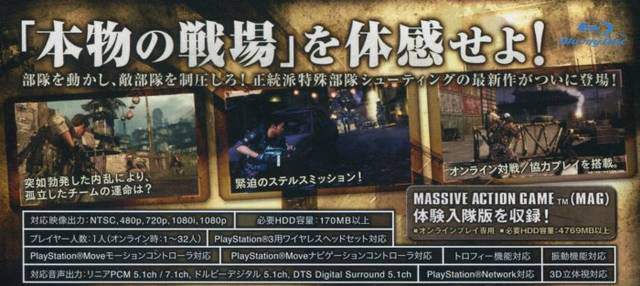
SOCOM 4 brought the full SOCOM experience to the PlayStation 3 with a 14 mission single player campaign,
classic and revamped competitive multiplayer modes,
and cooperative capable Instant Action missions along with 3D and PlayStation Move support.
The all new campaign gave the player intuitive control over four AI squad mates
using a new quick command system and introduced dedicated stealth missions
with light-based detection and enemy distraction options.
Competitive multiplayer saw the return of classic fan-favorite maps, such as Abandoned, along with new game modes and maps.
Support for up to five player online cooperative play, randomized objectives, and enemy density options made
Instant Action an "instant" player and press favorite.
SOCOM 4: U.S. Navy SEALs Launch Trailer
Courtesy of Sony Computer Entertainment
Designing Four SOCOM
After a fulfilling career spanning seven AAA titles I was recommended by my peers to transition into a content design vacancy.
At first I was a bit hesitant, as I was about to be promoted to a Test Lead,
but after I began fixing bugs, adding content, and creating memorable experiences
I knew that Design is where I had always belonged.
Systems Design Cover
Expand this entry to learn about my start in the world of Design.
Markup
SOCOM 4's cover system was quite robust, as it not only allowed a plethora of cover actions,
but also gave designers a high level of control over how players and AI could interact with cover.
However, specialized markup consisting of cover points and cover rails was required in order for this system to function in-game.
My first task as a designer was to add this markup on the campaign and multiplayer demo levels.
Adding markup of any sort to a level or environment in a game is almost as much art as it is design,
and is thusly a very time consuming task.
The tools team provided an excellent automatic cover generation tool to aid in this endeavor,
but it could only take things so far and had a tough time with complex arrangements of assets.
Even in a best case scenario, cover markup generated by this tool would require the adjustment of at least
10 cover flags per cover rail, while in most cases 14-20 cover flags and the position of the cover points and rails
would need manual tuning to ensure that cover worked correctly for both players and AI.
Despite these shortcomings, the tool was an invaluable asset and in just two weeks I had:
Completed the cover markup pass on the environment used by the campaign demo level.
It contained over 1000 cover points that required approximately 16,000 manual changes to cover flags, positions, and additional fine tuning.
Fixed the 20+ pre-existing cover related bugs that had been logged on the level.
Completed a partial cover markup pass on a multiplayer level.
Exposed and reported in-game limitations of the cover system.
Mastered the art of creating cover markup.
With the initial cover markup pass judged a huge success, I was asked to complete
similar passes on all the environments remaining in the game.
Over the next two months I added cover markup at a high level of polish
to the remaining 18 unique environments and each of their level variations.
The overall average was more than 800 cover points per environment, which means I was making, testing,
and checking in over 25,000 changes to cover markup each week.
When this task was originally assigned to me a major milestone was looming in the near future.
Based on the workload and previous time estimates, Production and Design never
expected the cover markup passes to be completed in time for it,
but due to my tireless dedication and zeal for the job I checked in the files for the last environment one day before said milestone.
Although a lot of this work was undone due to necessary changes to environments, at the time it was a great achievement.
Campaign level designers and AI engineers could now see exactly how the AI used polished cover markup, allowing for easier
tuning and bug fixes.
Multiplayer playtests also benefited greatly from my work,
as exploits and balance issues could be more easily found and corrected as players were finally able to take advantage of working cover.
After one such playtest my former test manager thanked me for all my hard work and remarked that the game felt like it was
playable as intended for the first time.
With the cover markup pass completed, each level was handed off to its designer for cover caretaking,
but I continued to help out wherever possible by fixing bugs and even doing entire cover markup passes for many of the
multiplayer levels in addition to my own work to help out the lone Multiplayer Designer.
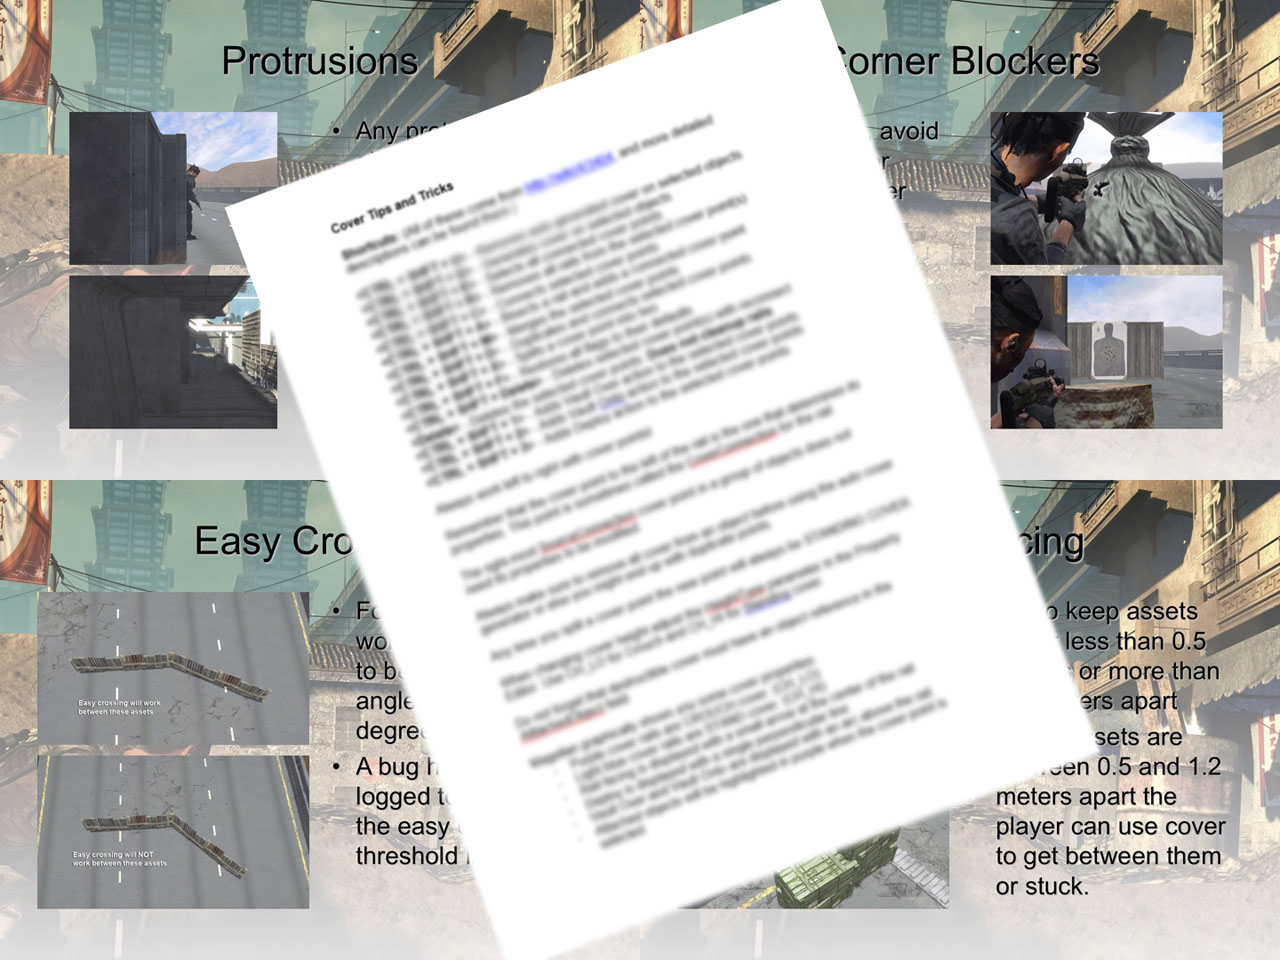
As I was working on the initial cover markup pass I was asked by production to teach a short class to artists and designers.
I put together a presentation with more than 50 images and 13 movies to show everyone what I had learned.
It featured advice on how to place assets to avoid creating bugs with cover, how to move assets with existing cover markup,
instructions on creating and tuning markup, and common pitfalls to avoid when working with cover.
I also condensed the excellent documentation that had been created by the
tools engineers on cover markup into a one page "Cover Tips and Tricks" handout.
This handout was well received, and updated versions remained in use by many artists
and designers all the way through the production of Unit 13.
The session was a huge success, as many existing asset position based cover bugs were fixed in the following weeks.
Additionally, I was grateful to learn a few tricks from the artists on using the level editor that helped speed up my own personal workflow.
Improvement
As I worked on markup I looked for ways to improve the quality of cover in the game.
Often this involved adding vault actions to allow players to climb structures
or the splitting of cover rails to support crouching and standing cover stances as the height of the object varied.
I also performed markup experiments to see what would feel best to players.
In one fairly symmetrical multiplayer level I removed all the "useless" cover rails after completing the cover markup pass.
These "useless" cover rails included cover rails that had no peeking points and those more than five meters from the edge of a long building.
Once complete, I told the leads of the changes and asked for their feedback.
Although they liked the feel,
there was concern that it might feel inconsistent to not have cover markup everywhere and the idea was scrapped,
but at least it had been explored.
Throughout making these improvements I took note of features that were either malfunctioning or missing from the cover system.
Thanks to my testing background I was able to explain any problems I encountered clearly so that the engineers
kind enough to help me out knew exactly what I was asking for.
This working partnership bore many fruits, many of which involved bug fixes to issues that had gone unnoticed or had been
poorly reported, as well as two big changes to vaulting and cover that filled the gaps in an otherwise excellent system.
The first of these changes was the repair of a flag that allowed cover rails to be placed that did not actually allow characters to
enter cover. These "coverless rails" might seem strange, but they made it possible for designers to place any vault actions on
objects that should not allow cover, such as chain-link fences or railings.
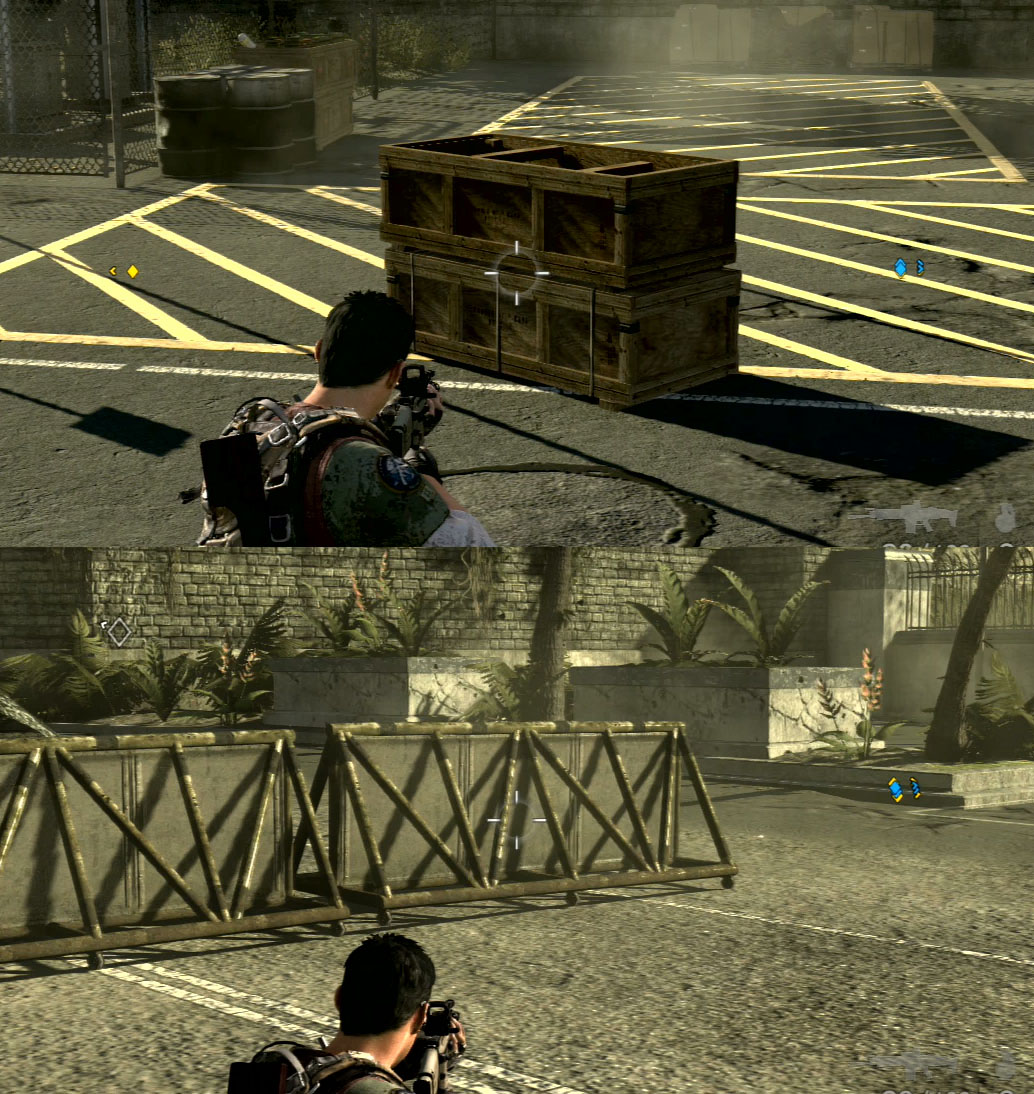
The second change was probably our greatest contribution, the "Vault Slide" action.
When I started on cover markup there were only two vault actions.
One was called "Vault Over" and allowed characters to jump over objects, but only if they were very narrow.
The other, known as "Vault Onto", allowed characters to jump up and onto chest height assets,
but this would often leave the character very exposed.
As I added and tested cover markup it became clear that something was missing.
Vault Over was great, but couldn't be used in very many places while Vault Onto basically painted a huge target on
the character, especially on multiplayer maps.
The solution was simple: characters needed to be able to slide across cover objects.
They needed a "Vault Slide".
Before moving forward I made informal inquiries to see if adding a new vault action would even be possible.
Happily, the animation department had already made an animation that would be perfect,
while engineering and tools said it would be a simple addition with no schedule impact.
With the major stumbling blocks out of the way I quickly created a demo level in which I had hacked some of the cover rails to
play the sliding animation and others to use the existing vault actions.
I set up a meeting with the design leads and showed them the level.
They were hooked and immediately approved the addition of the feature, which appeared in the level editor and game just a few days later.
Vault Slide was an instant success, as it allowed for great impact throughout the game.
Players and AI could now slide across the hoods of the cars throughout the first campaign mission
while multiplayer squads could push up with minimal exposure as they slid over ammo crates, damaged walls, and other cover objects.
And while I cannot take credit for inventing the idea of a "Vault Slide",
as it had appeared in countless 1980's action movies and television shows,
I am glad I brought it up and campaigned for it, as it not only added value to SOCOM 4,
but also featured prominently and allowed for additional changes to the cover system in Zipper Interactive's next game, Unit 13.
Legacy
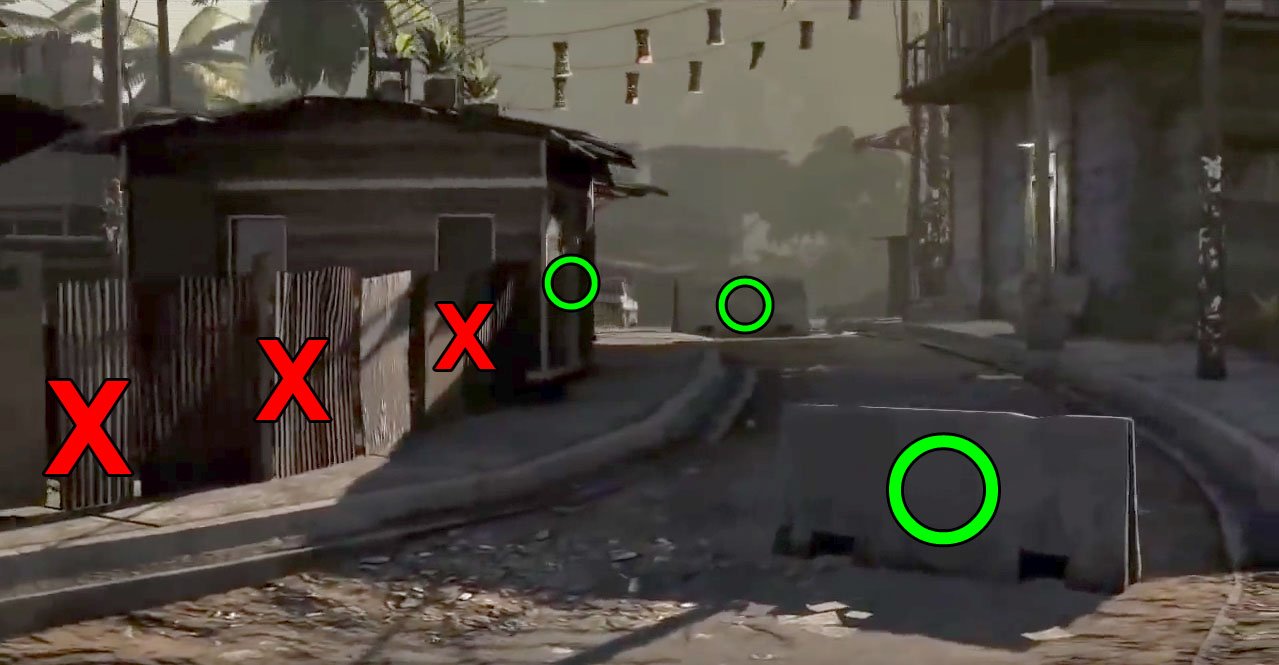
Despite some bugs I am very proud of the cover system and the ways in which cover both support and enhance the gameplay of SOCOM 4.
But don't take my word for this, have a view of the following video to see cover in action in the shipping version of the game!
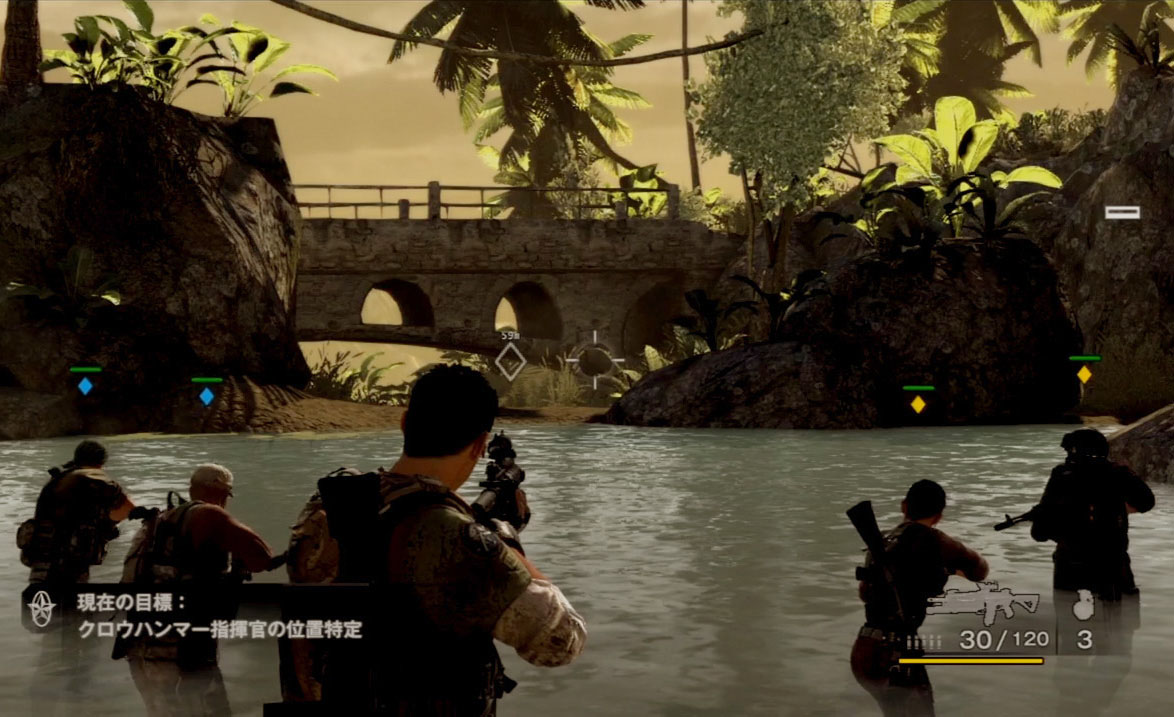
Level Design Instant Action
A history of what made the Instant Action / Co-Op levels the best received part of SOCOM 4: U.S. Navy SEALs.
Lights! Camera! Instant Action!
The quality of my work with cover markup landed me a spot as a level designer on the newly formed three person Instant Action / Co-Op team.
We were initially assigned the challenging task of creating multiple unique missions with the following parameters:
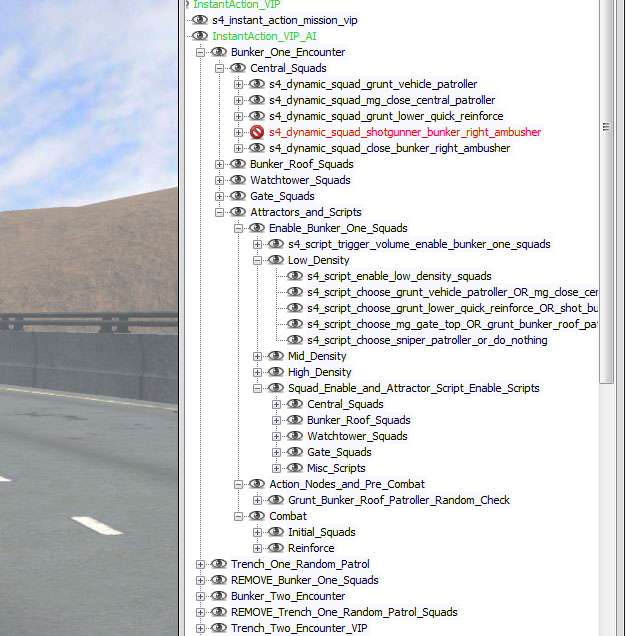
Use of existing Campaign environments
Support for three densities of AI
Randomized objectives and AI placement
Fun to play with support AI or in Online Co-Op
We took these directives and in the end created the best received content in SOCOM 4.
It was a long hard road filled with challenges and heartbreaking obstacles, but I am very proud of what my team and I accomplished.
There is a great deal to the story of Instant Action and Co-Op in SOCOM 4, so please take a moment to view the following video.
It shows off exciting moments from all the missions I designed and should get the adrenaline pumping!
Prototyping
We began by playtesting some quick prototypes on teams of two to five human players to validate the game types and gameplay.
I inserted varying amounts of AI into my test levels and found that human players were not terribly challenged even when outnumbered 2:1.
However, when this ratio approached 4:1 the large number of enemies worked well to create an emotional response
among the players and foster teamwork.
During these tests it was also discovered that players could easily lose focus,
so we learned that a guidance system of some sort would be necessary.
But the best result of the prototypes was how much fun the playtesters had.
Despite an almost complete lack of art or design polish the fun shone through.
As the environments had already been constructed, I focused on identifying ideal encounter
and objective locations while trying to avoid creating layouts that were too similar to the existing campaign missions.
The lack of an AI sleeper system had a great deal of influence over this stage of planning,
as it favored the creation of linear missions.
Unfortunately, linear layouts would make it a challenge to insert tactical options
so I looked for encounter areas that could serve as choke points,
where the team would need to work together in order to push forward,
and areas where players could approach stealthily, observe the enemy, set up in multiple locations, and then begin the battle.
It was also important to consider how AI would enter these encounter areas, as we needed to hide all spawning and allow for reinforcements.
Once the best encounter areas were identified I used a combination of traditional paper maps
and the actual game itself to come up with the best mission layouts.
After I was satisfied with the overall mission flow, encounter area usage,
and objective placement I updated the paper maps to act as design documentation
should a successor ever need to take over my missions and also to act as a specification for test.
Implementation
Although my mission plans looked great on paper, the next step was to implement them in-game for playtesting and validation.
These initial implementations were a bit of a balancing act,
as I didn't want to overdevelop the missions only to have them change but
I also didn't want to present any distractions to the playtesters in the form of boring encounters or things that felt incomplete.
After the playtests validated the mission layouts it was time to start scripting.
As Instant Action was a "new" feature, there was no pre-existing framework for handling AI spawning and population controls.
So I had to create interwoven scripts to handle randomization, population controls, and density levels of the AI.
This task was complicated a bit by the engine's use of a visual scripting system,
but thankfully it was event driven and featured many useful constructs,
like event listeners that would fire off other scripts once a variable reached a certain value or another event had occurred.
I quickly learned how to work around the limitations of this system and created a template for randomized encounters that I
was able to use in any mission.
This template made it a breeze to create and randomize encounters; however,
the random objectives presented additional challenges as encounters needed to be able to
scale or change based on the presence of objectives.
I handled this by using multiple copies of my encounter template
to create each possible flavor of the encounter and then having additional scripts
select the correct one based on the objectives that had been chosen.
With the basic framework for the mission scripting completed, all that remained was the placement and tuning of the AI.
All AI had built-in behaviors, so about half of this task was simply placing the correct types of AI
in locations where they would be most effective. These behaviors could be overridden,
and the other half of the work involved choosing when and how to do so.
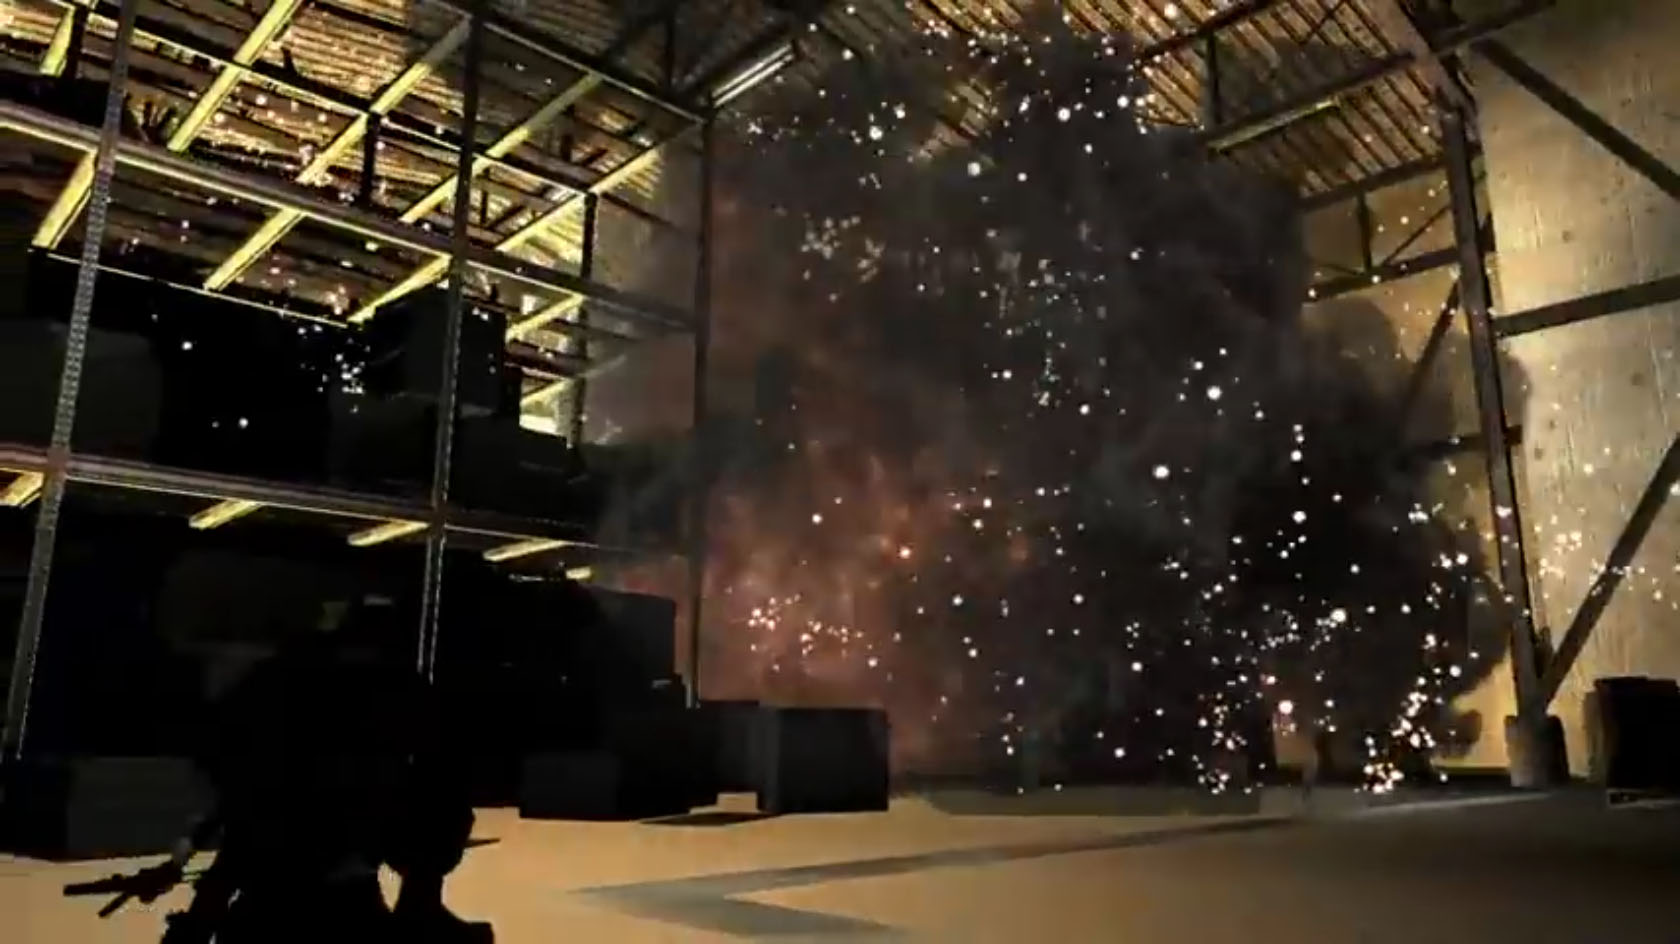
Another important part of AI placement was ensuring that the players would never see AI spawn in to the game.
The generally linear layout of the missions helped make this easier,
and any special reinforcements for end level encounters were always accompanied by smoke to hide the spawning.
Playtesting resumed on these fairly complete missions,
with tuning of AI behaviors and actions being the main outcome from these tests.
Icing the Cake
As testing confirmed that the missions were working well and fun, it was finally time
to add polish-like elements to make the missions feel complete.
Drawing on my experience with multiplayer playtesting I knew that most things could go wrong
as players waited for a match to start.
Most commonly, someone would “accidentally” throw a grenade and wipe out the team or alert the enemies.
To avoid this situation I not only placed the start point for all my missions
somewhere safe and about five or more seconds from the first encounter area,
but also added scripting to make it so that no encounter AI would spawn until a player left the starting area.
Through observing playtests we noted that most people just wanted to shoot things
and were not necessarily interested in being tactical.
However, for those who played stealthily the idle AI were rather dull to observe.
To fix this and make the levels feel more alive patrol paths were added,
AI were set up to perform various animations from simple idles to group animations where multiple AI would come together.
Some AI were even set up to guide the players to secret areas... or right into a trap!
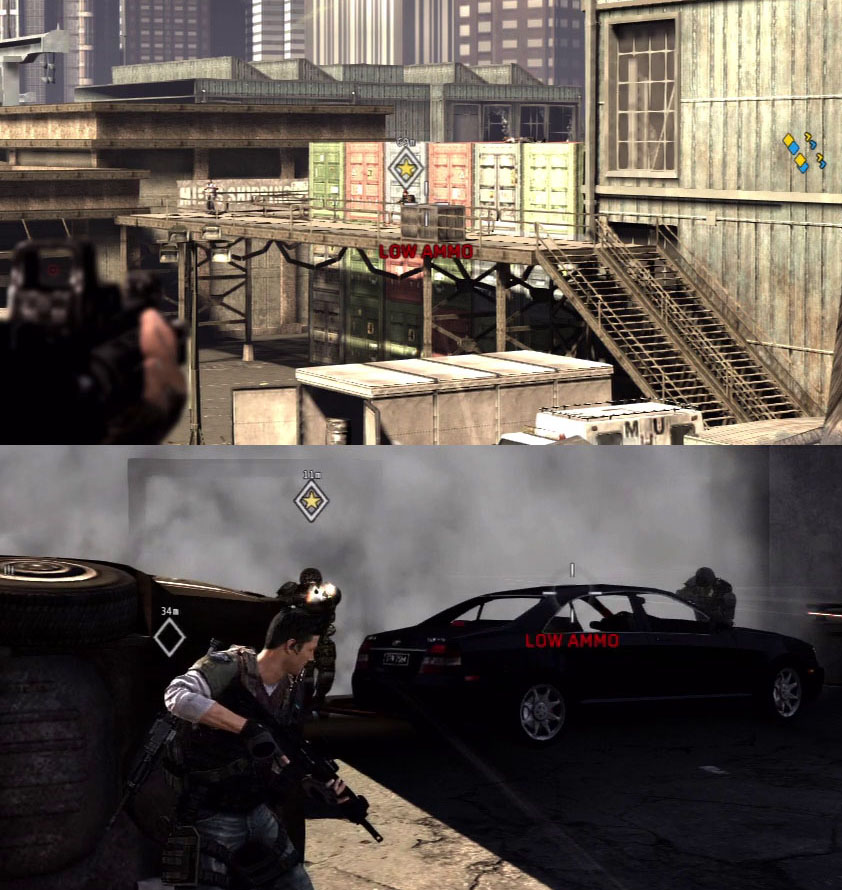
Resupply crates were also added, as without bullets the players could not shoot.
I added these crates either at the mid-point or end of each normal encounter and at various points
in end level encounters to make sure players could stop for ammo as they progressed without having
to make a boring run back to a previously cleared area.
Finally, more thorough guidance was added in the form of HUD waypoints, which are also known as "breadcrumbs".
These had existed on objectives after we learned, players needed guidance during the prototyping sessions,
but at this time we scripted and placed non-objective variants to guide players from objective to objective.
The missions now felt complete and were ready for fine tuning and polish!
The cycle of tuning and playtesting continued until my missions were ready for polish... but then disaster struck.
Revised poly budgets resulted in all the environments my missions were using to undergo drastic art changes.
Entire areas I had used for specific game types were removed from the game,
and other areas were changed so much that the encounters no longer worked correctly.
The silver lining was that tech would not be available to support two of the game types we had worked on,
so I only had to redesign six missions instead of twelve.
Although I had to work out new paths through the updated environments
I was able to save a great deal of time by repurposing many of the encounters and associated scripting into the new mission layouts.
It was a sprint and a marathon, but when the next milestone came
I had zero bugs and all six of my missions were tested and checked in with a
relatively high level of polish before the end of business that day.
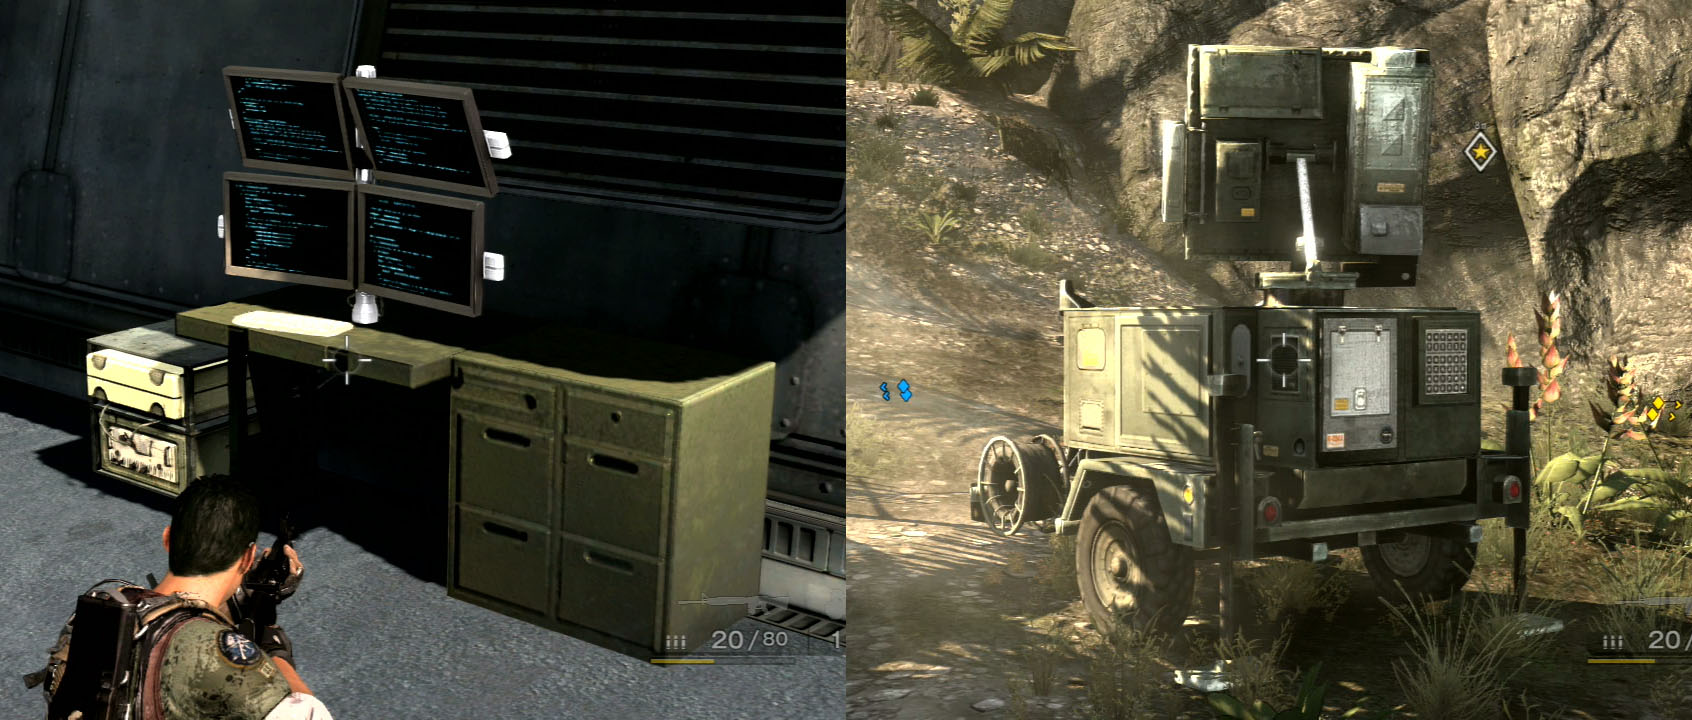
Espionage Innovations: Terminal Assets
One of the remaining game types left after the environment update catastrophe was called "Espionage".
The goal of this game type is for the players to collect three of five randomly chosen
Intel items and use them to hack terminals at the end of the mission.
But it wasn't always like this...
Early on this game type featured the same Intel items,
but the end goal was to secure and disable bombs the enemy was preparing for transport.
This change seems quite trivial, as it was largely just an asset swap.
However, the bomb asset was well suited to being placed in any interior or exterior location within
an environment while the terminals looked like they belonged inside a high class office building.
This change came well after the missions were laid out and scripted,
so I looked for a solution in the form of a better asset for the terminal.
After going through the entire asset library I found one that looked just right.
It appeared to belong outside and featured a keypad for interaction.
Upon testing the asset I found the standing keypad animation was not quite right, but after checking with the animation department
I learned they were already scheduled to fix this.
So without the need for any additional work I gave myself and the other designers an option for
an outdoor final asset that suited the game type well.
In order to make the end of each Espionage mission feel like a boss battle I created very large encounters with some extra polish.
To begin with, I have the objective breadcrumb icons that appear above each terminal fade in successively with a delay.
This is very subtle, but I feel it creates a sense of finality, not completely unlike seeing the weak point in a traditional
boss enemy exposed.
All of my Espionage missions feature a large last defense from the enemies,
complete with high powered enemy types and seemingly endless reinforcements.
But I didn't want all three to feel the same so I created a unique style of spawning for the reinforcements for each mission:
Countdown
Enemy reinforcements spawn in one wave at a time to attempt to subdue the players.
To avoid cases where only a few enemies remain, the next wave is triggered on a slight delay when the overall population has been
reduced by 75%.
Fluid Dynamics
This mission also uses waves of reinforcements, but it spawns them in staggered sets of two.
The population is allowed to exceed the density selected by the player at the start of the mission by up to 25%,
but the delay between each set has been extended to allow the players more time to regroup.
Turning Point
This mission features a constant population. As a squad is eliminated another spawns to take its place.
During any of these final battles I added behavior overrides to each terminal that "grab" and attract the closest squad of enemies
when a player begins hacking.
Once a terminal has been hacked this functionality is turned off so players cannot use it at as exploit.
As a bit of an Easter egg, if there are any enemies left when the players hack
the final terminal they are all scripted to run from the battlefield using specialized flee animations.
Although it is a very short period of time in which this can be seen, I added it to give
the players an added sense of satisfaction as they see the enemies run away in fear.
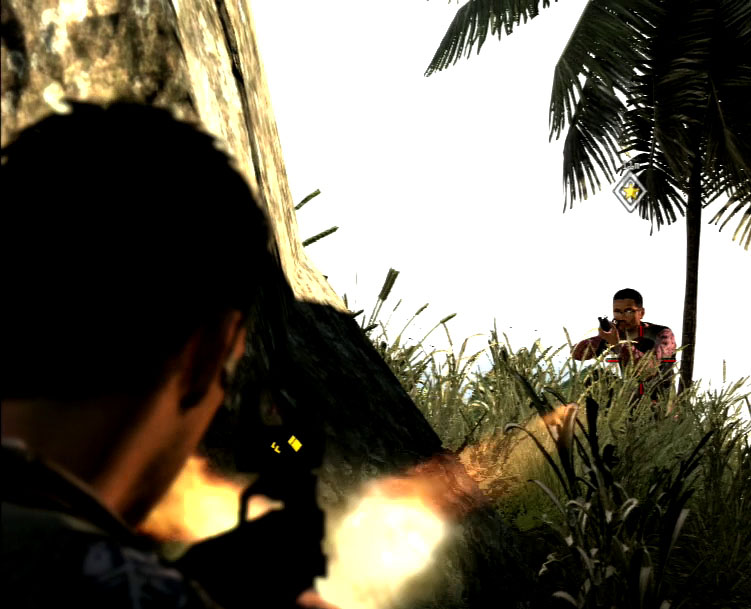
Espionage Innovations: The Turning Point Gate
One of the unfortunate consequences of Co-Op support is that AI had to be spawned based on the position of the player(s).
This meant that players could reach the end of any Espionage mission without collecting all the Intel and the final battle would play out
even if the players could not actually hack the terminals.
Then when the players returned after collecting all the Intel they would have to hack the terminals with no resistance.
We had been told that gating was impossible in Co-Op, but I took my knowledge of the
cover and scripting systems and found a way to make one.
Another designer had created fabulous assets for us to use that simulated smoke and frag grenades that we could trigger by script.
By combining these with destructible cover objects I created a gate at the end of the
Turning Point mission that only explodes once the players have collected all the Intel.
The moment is made more special by powerful enemies running out of the smoke from the destroyed gate to engage the surprised players.
Once again, I used what was already there to make something new.
Though, to be fair, a copy of the cover asset that did not leave anything behind once destroyed was needed,
but the artist kind enough to make this change said it was a “10 second fix”.
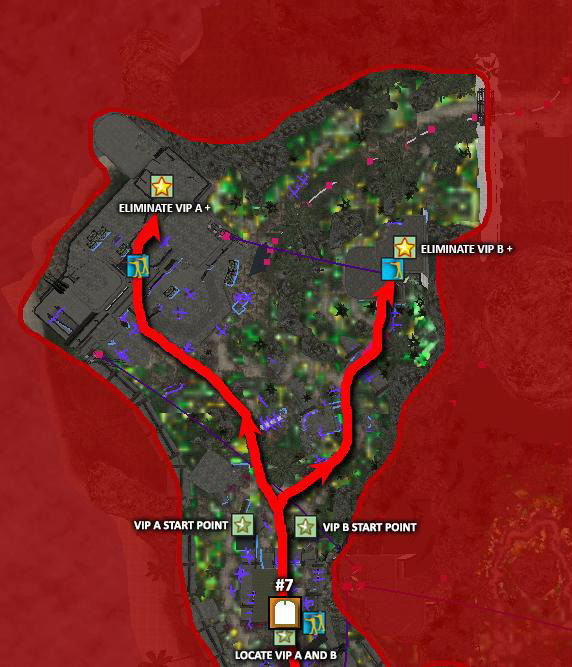
Takedown Innovations: Pursuit of the VIP
The other shipping Co-Op game type was called Takedown.
Its original goal was to locate and assassinate a special VIP located somewhere in the mission, usually near the end.
While the VIP spawn points were randomized, there was something missing from this game type...
I thought about what I could do to make the game type more thrilling and came up with the idea of the chase.
I then set to prototyping this by chaining a series of behavior overrides known as “attractors” together.
This worked out great and once threatened the VIP would run all the way to the end of the level.
To make it more interesting I layered scripting onto the VIP's escape so that he
would stop and fight alongside enemies in each encounter area to give players multiple
chances to kill him early.
This scripting would also make the VIP move to the next encounter if the enemy population dropped too low.
Killing the VIP early would result in different bonuses depending on the mission,
so the game type was now much more entertaining.
However, we found that the VIP would become the target of the players and could be easily downed by experienced squads.
The Co-Op lead then suggested adding a second VIP at the end of the level,
and this was done to ensure that players got the full experience even if they killed the first VIP right away.
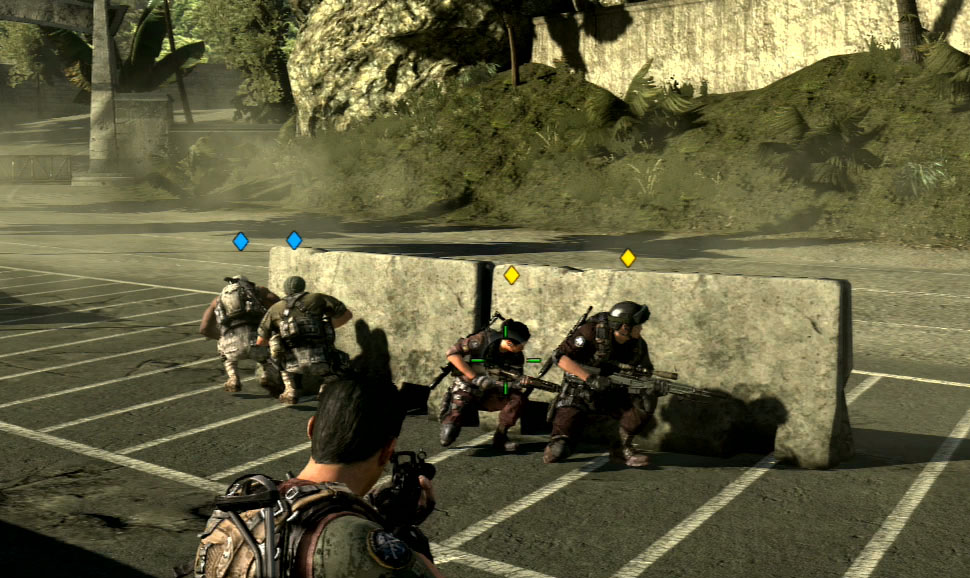
As with the finales of Espionage missions, I came up with different scenarios to make the VIPs feel more unique in each mission:
Countdown
When the first VIP is encountered in this mission several explosions occur to simulate an airstrike or a trap.
While this cannot hurt the players, it is meant to provide cover for the VIP and enemy forces coming to extract him.
I also placed a damaged vehicle in the area to reinforce the fiction of the VIP being stranded.
Killing this VIP early reduces the reinforcements in the final battle of the mission.
Fluid Dynamics
In this mission one of the VIPs might appear near the end of the level and begin running to join the other
or both might appear in the final battle.
This was done to make this mission feel more random, and there is even a chance that one of the VIPs will be Razad.
Turning Point
Turning Point features my favorite use of multiple VIPs.
About three quarters of the way through the level the first VIP will appear during an intense firefight.
He will then run to one of two end game locations.
The second VIP will randomly appear in one of the end game locations along with reinforcements.
Killing the first VIP will always reveal the location of the second,
so players can save themselves having to check both end game locations for the second VIP by killing the first early.
If the first VIP heads to the opposite end game location of the second then he will have light support and players
will have to fight encounters in both locations.
If the first VIP joins the second then the players need only fight in one location, but the resistance will be higher.
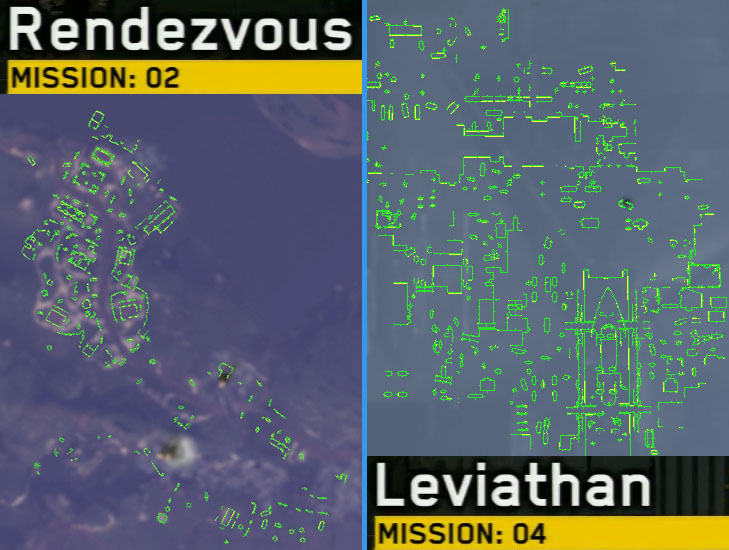
Levithan
Although I was not the original designer on this mission, I was asked to help out with the scripting and polish.
In this mission the VIP appears at the end,
so I added a random chance for him to run to the hills behind him to link up with some powerful reinforcements.
I also added a chance for this VIP to use the Razad character model from the campaign to satisfy
all the players that wanted a chance to take him down.
Mission Design Campaign Stealth
The newest Designer plus a forgotten mission results in success!
The stealth missions in SOCOM 4 were very complex and took time to set up.
As they grew to become a back of the box feature the designer originally responsible for them had to spend
a great deal of time tuning and polishing the first of these missions, which was being used as an internal proof of concept demo.
This made it impossible for anyone to maintain all of the stealth missions under normal circumstances,
and with the many changes made to a certain environment one of these missions fell into disrepair.
Based on playtest results from my Co-Op missions, the design manager asked if I could put off polish and tuning work
and instead focus on the forgotten stealth mission, Revelation.
Reviving Revelation
I have prepared a narrated walkthrough of this mission.
Feel free to check it out at any time by scrolling to the end of this section or
clicking here.
The mission had been set up with the best of intentions,
but due to environment changes it could not be completed naturally and was blocking test passes.
So my first step was to unblock test.
After researching the design docs for the mission I temporarily removed the AI that were making the mission impossible to complete
so that test would no longer be blocked.
As I started to restore AI to the mission I wanted to avoid the typical “trial and error” aspect
that had given stealth a bad name in action games.
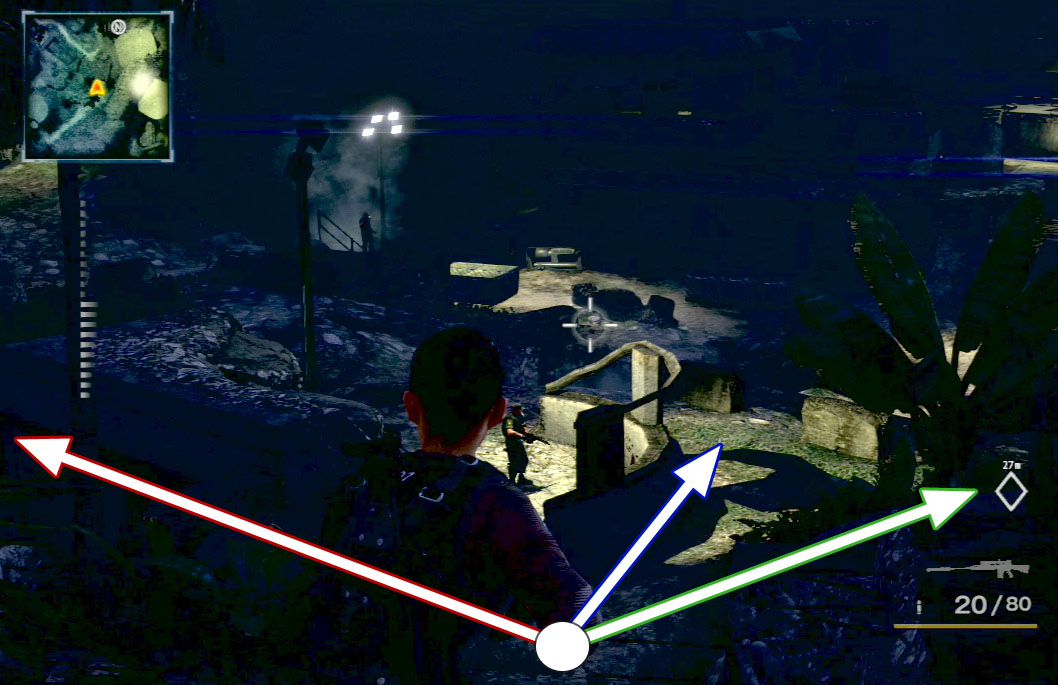
To do this I planned out two to three routes in each of the three main areas of the mission
that the player could take to reach the next objective.
One route would be the safest, guided by breadcrumbs and voice-overs, and would reward players for patient observation.
Enemies would never walk into “resting” zones along this route, so players could safely observe the enemies and then make
a move once they were confident. This route would also be the slowest.
The remaining routes had no obvious guidance and would place the players in more dangerous situations.
But they could be completed much faster, and were more of a hidden challenge for speed runners
or stealth fans that wanted to test their skills.
I then brought back the AI I had temporarily removed and set them up to work with the new routes.
When compared with Instant Action this was a breeze, as I only needed to worry about the view of one player when hiding spawn points.
The original designer had also left me some wonderful patrol paths, which greatly aided my setup of the AI.
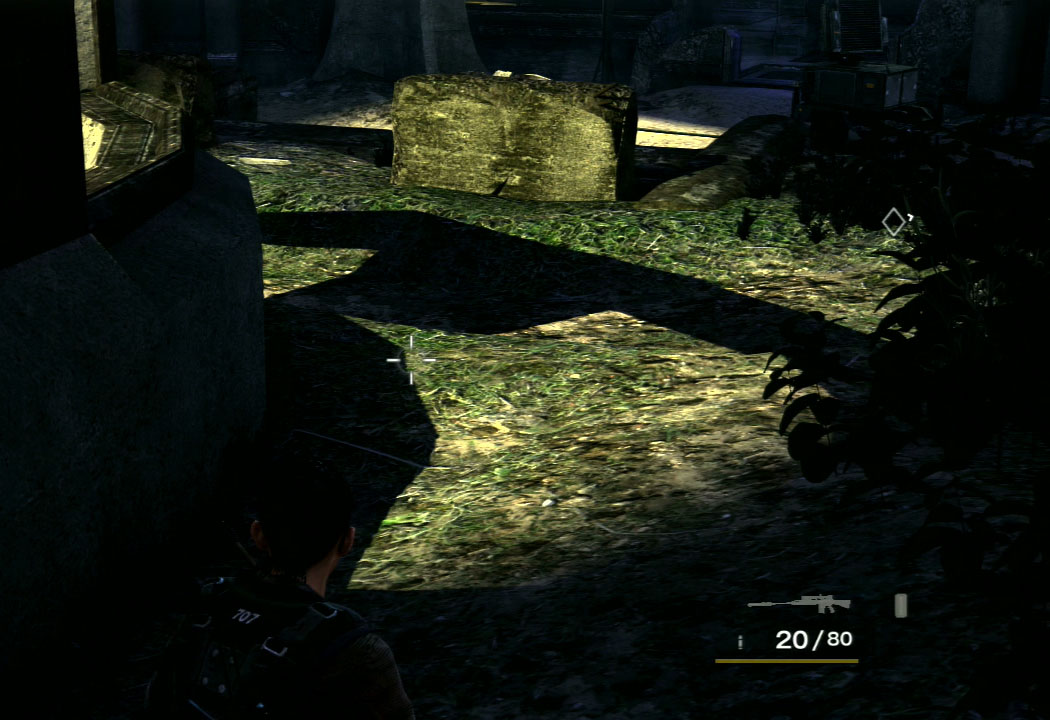
Systems Shock
As the time of day was static in the stealth missions, designer placed markup was used
to designate areas of light and shadow with pinpoint accuracy.
Creating the markup was a time consuming task, but luckily I found a couple major bugs with the system and came up with a suggestion.
One of the bugs was that the player would “fall out” of the shadow markup if they walked off a ledge.
Attempts to adjust the height of the shadow region just led to other bugs.
The other bug was that the different markup types did not function within each other.
This led to double or triple the time needed to create markup in these cases, especially when inside buildings.
My suggestion to fix this was to just make the entire level treated as basic shadow.
This meant the player would be safe when crouched and not too close to the front of an enemy.
The leads from design, engineering, and tools agreed with my proposal and the fix was implemented.
No changes were needed to the existing light markup, and the former shadow markup was repurposed to give designers more
flexibility by allowing areas of deep shadow to be created.
Unfortunately for the other stealth mission designer, some of his original shadow markup work on the demo level was no longer needed,
but we were both saved about a week of markup creation, testing, and bug fixing on the remaining stealth levels as a result of this change.
Revelation Revolution
Having sorted the path through the mission and the AI placement, it was time to polish and make the mission shine!
Here are just a few of the updates I was very happy to include:
Voice-over Timing
I adjusted the trigger of the voice-over that plays when the player moves toward the first bunker after the insertion cinema
so that it would finish before the player is able to trigger the next cinema.
Cinema to Game Continuity
During the "Gorman Reveal" cinema, the Gorman character is seen talking to a lone Clawhammer character.
However, as soon as the cinema ended, if the player looked to the area where it had taken place they would see
four AI, and sometimes none of them matched the character from the cinema.
To fix this continuity issue I placed three of the four AI out of sight and
added scripting to have them walk into the area after the cinema ended.
Finally, with a little help from my Co-Op lead, I created an AI spawner that would always spawn an AI that matched the character
from the cinema.
The Mission Out
Initially, there were no safeguards against allowing the player to move to the final area of the mission from the start.
To prevent this I added a "mission out", which consisted of two triggers.
The first would display a warning and the second would fail the mission.
These triggers were accompanied by voice-overs, both of which I wrote.
Conversation Conservation
A great number of special conversations, animations, and guidance voice-overs had been planned for this mission before I took it over.
As these became available I added all of them to the mission, even going as far as to make minor changes to the flow or
add additional AI to suit some of these voice-overs.
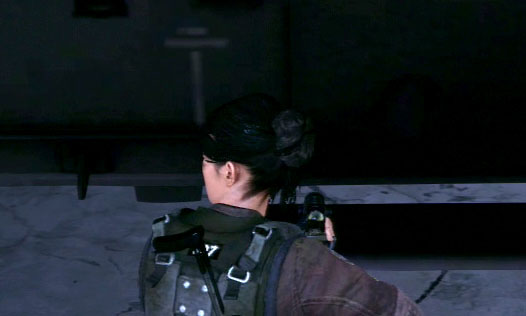
Turning Heads
When completing the "Bug the Helicopter" objective, the player character originally did a strange “phone dialing”
animation on the side of the helicopter that did not match her actions in the cinema that followed.
After trying all of the currently available animations and finding nothing that worked I asked the
animation department if they had anything simple that might work.
I suggested a "guilty head turn from left to right" and they said they had just the thing.
What I got was a fabulous "last look to the left head turn" animation that was perfect as a lead-in to the cinema.
Operation: Broken Turret
A machine gun turret exists in the final area of the mission.
The original intention of this turret was that if the player disabled it in this stealth mission
it would remain this way in the following campaign mission.
Unfortunately, its placement left it so vulnerable that the player could easily destroy it without any risk,
and it was impossible to move due to its position in the following mission.
To make matters worse it would explode, but this event was special, so the AI would not react to it.
As the turret adds a lot to the first encounter of the following mission, I worked with the art and animation departments
to get a broken version of the turret and scripted the AI nearby to appear to be repairing the turret.
Extraction Sequence
This mission was originally planned to end with an extraction cinema, but it was sadly cut and replaced with a long voice-over.
Rather than settle for just triggering this voice-over,
I scripted and timed out all the events involved in the new ending sequence to make it feel as polished and intentional as possible.
Here is a list of the main events that occur as the player approaches and enters the extraction trigger
(when the mission is not in a potential or imminent failure state):
As the player approaches the extraction point, a congratulatory voice-over will play if they have not broken stealth during the mission.
(The trigger for this voice-over has been placed to ensure that it finishes playing before the player can reach the extraction trigger.)
Upon entering the extraction trigger several things occur:
Any suspicious, but not alerted, enemy AI will give up their search for the player and head back to the bunker.
The extraction objective icon is faded out and its objective complete message is displayed.
The end of mission voice-over is triggered.
All player controls save for camera rotation are disabled.
This serves double duty as it smoothly brings the character to a stop and prevents the player from attempting to return to the bunker.
As the end of mission voice-over comes to a close, a short piece of music is triggered.
The screen begins to fade to black as the music starts winding down.
Once the screen has fully faded to black, the mission complete message is displayed.
Although the purpose of this website portfolio is to showcase the talent, passion, and drive that I bring to every
project I have been a part of, I have also been very diligent to mention the many colleagues who often enabled or enhanced my successes.
In the case of the Revelation mission, I was very lucky to have one such person keeping me honest all the way to ship.
This person was an amazing tester, and I was blessed to have him assigned to my mission.
Although there were not many bugs, he found every single one, every time.
This included always managing to find a new way to break the mission failure/success flow
if the player engaged the Gorman character early on.
Thanks to his bugs I was able to find holes in my scripting and the issue was finally fixed for good.
(Most of these bugs required sub-second precise repro steps!)
Outside of catching my own errors, he also did an amazing job of logging every art, audio, and cinema bug in the environment,
leaving me free to concentrate on improving and polishing the mission.
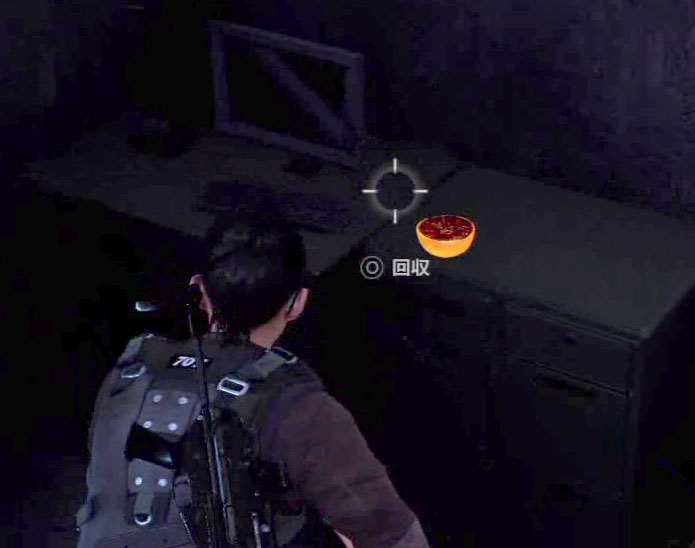
As a special thank you, I let him select the location of the hidden blood orange collectible in the level.
Black Holes and Revelations
While Revelation is not the longest mission in the game,
I think it serves as a good valley between the intense finale of the preceeding mission
and the heavy combat of the following.
But perhaps the best praise of the mission came from one of Zipper's top engineers long before SOCOM 4 shipped.
He said, “They gave the most broken mission in the game to the greenest designer and it's now one of the most polished.”
DLC Level Design EVAC Game Type
A wild game type appears!
The EVAC Game Type
For DLC we added a new game type called EVAC to Instant Action.
It was envisioned as a more frantic game type, in which the players needed to battle their way to an extraction point and
then hold off endless waves of enemies until rescue arrived.
To add to the excitement of the new game type, all players could watch the extraction vehicle fly in to the pick-up zone
and then fly out of the level once the mission was completed.
The networked extraction vehicle took a little more engineering time than expected,
so by the time it was working most of the design staff had moved on to Unit 13.
As the most senior Instant Action level designer remaining, I volunteered to place the extraction vehicle
in each of the EVAC missions.
The flight path was preset, so I tuned the position of the vehicle to ensure it didn't clip into anything
during flight while also searching for the most interesting camera position.
Turning Point: EVAC
The launch of a game is normally a time of celebration for most studios,
but a couple of tragic events cut the revels short soon after the release of SOCOM 4...
Just a few days after launch, hackers took down the PlayStation Network, making it impossible for players to enjoy Multiplayer or Co-Op.
This crippled the release by effectively taking away one of the main reasons that gamers had liked SOCOM games in the past.
Following this, a devastating layoff occurred at Zipper Interactive.
I inherited an Instant Action mission on a familiar environment as a result.
Happily, a fair amount of the mission was complete.
But I did need to update most of the population control, density selection,
and randomization scripting to allow the final encounters to function correctly.
I was able to use many of the scripting templates I had created during production to aid in this process,
which allowed me to have the mission ready for playtesting within a week.
Big thanks to the original designer of this mission for so much great work!
Leviathan: EVAC
The original designer on this mission was also the technical designer and Co-Op Lead.
He was very excited to finally have the chance to work on content creation,
but was unfortunately pulled from this mission and moved to Unit 13 before he was able to finish setting up the first encounter.
While this mission was not very far along when I inherited it, the layout was excellent
and I began setting up the encounters as they had been originally planned.
I had debated changing the first encounter due to its proximity to the players' insertion point,
but I enjoyed how it played and decided to keep the original placement.
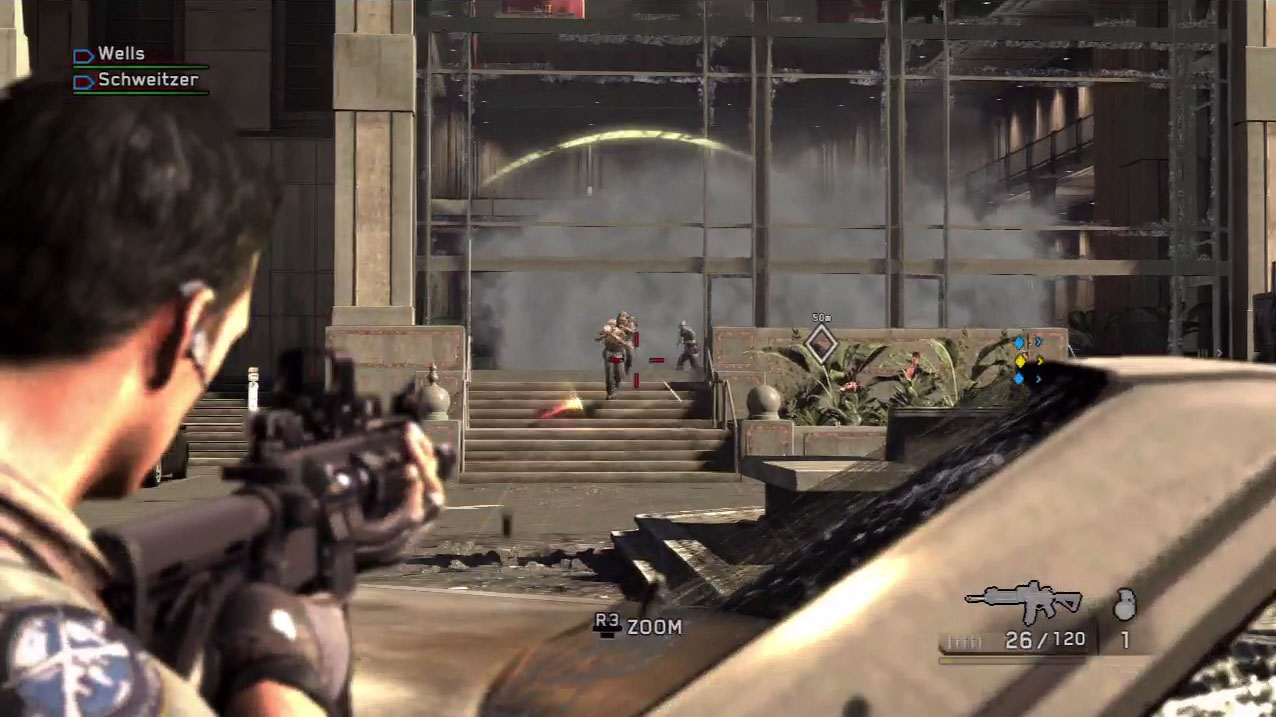
The following encounter was unique since the water filled area below the ship had never been used in a mission before.
The small size of this area didn't allow for a lot of tactical options,
but it was perfect for AI with close combat behaviors and ambushes.
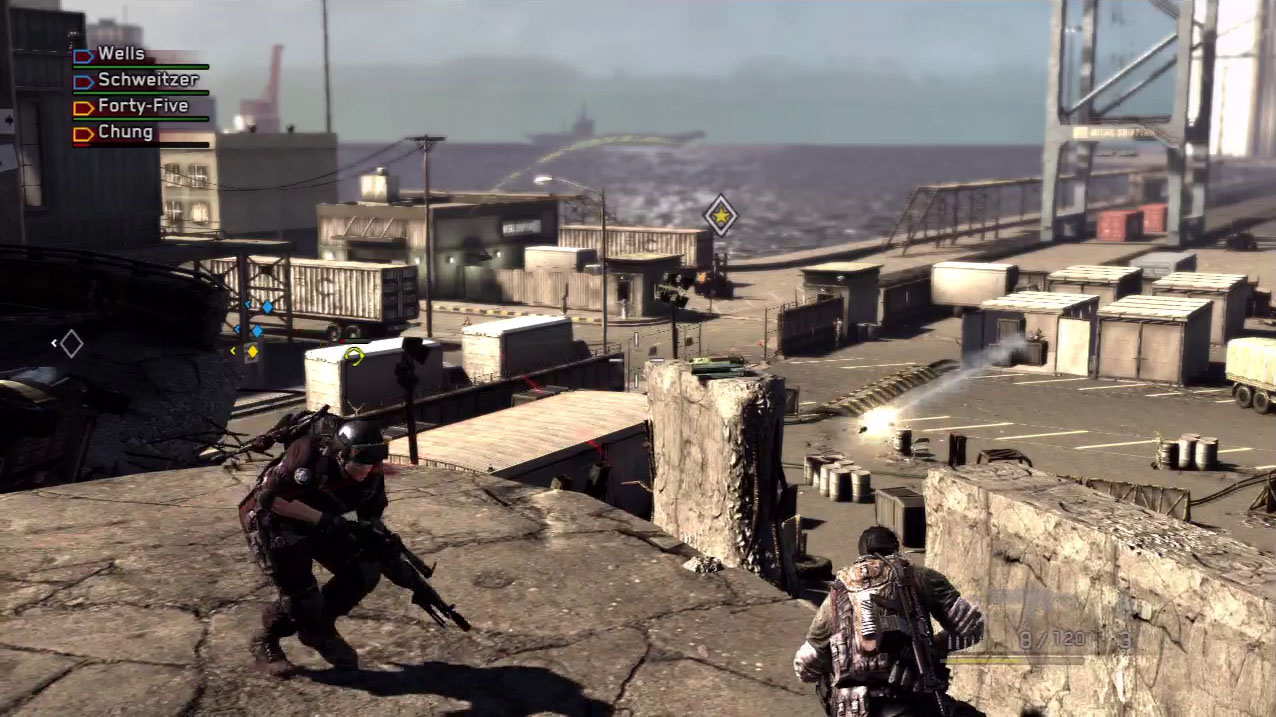
Of all the encounters in this mission, none was as enjoyable to create as the final one.
This was designed so that the players could either fight from the ship, the cover below, or split up between both locations.
It provided a lot of tactical options for the players,
so I balanced the scales by adding many cargo container assets to give the AI similar high ground advantages as well as a hidden
area to spawn from.
When the encounter was complete it featured AI jumping from cargo containers,
running in randomly from both the container maze and warehouses, and some other "explosive" surprises
making it a memorable part of the DLC pack!
DLC Level Design First Strike
Everything that was and could have been...
Taking the Reins
With SOCOM 4 wrapped up it was time to begin work on DLC.
As the most experienced Co-Op level designer, I was asked to create Espionage, EVAC, and Takedown missions using the First Strike environment.
It was exciting to start fresh with the experience of SOCOM 4 behind me,
and I created three missions that I still consider to be some of my best work.
For this game type I took the concept of randomization to new heights.
Areas in which Intel items spawned featured unique encounters,
which could randomly spill into other encounters or consist of specialized enemy types.
A great example of this is a sniper battle I created at the midpoint of the freeway to defend the Intel item.
During playtesting the lead designer gleefully exclaimed that it might have been the scariest moment in the game.
As players reached the end of the level, an intense battle occurred at the gate and main entrance to the embassy building.
Once players fought their way into the embassy, random AI tried one last time to stop them.
But then, as the players began to hack the terminals, snipers would take position on the roof and add pressure to the finale.
Their appearance was announced only by the shattering glass in the skylight.
This new game type began with a fight to enter the embassy building,
but was much lighter and more varied from the one used in Espionage.
Upon reaching the embassy wave after wave of enemies rushed the courtyard in attempt to defeat the players.
This defensive moment offered a lot of tactical options to players,
as they could attempt to fight from the courtyard, from inside the embassy,
or split the team and defend from multiple locations.
To make the end a bit more exciting,
once the extraction vehicle arrived the players would have to fight their way out to the courtyard gate in order to extract!
This mission largely followed the path of the campaign mission,
but started at the embassy gate. Upon reaching the midpoint in the broken freeway,
a huge encounter unfolded between the players and the enemies below, on the containers to the sides,
and sometimes on the upper freeway.
As this encounter progressed, one of four random VIPs would appear in the area.
He could appear with additional snipers on the containers, at different points down in the middle of the area,
or he might blow open the blocked cargo container on the freeway early and surprise players concentrating on the battle below.
The next encounter area occurred on a shaded area of freeway dotted with explosive vehicles,
where enemies equipped with grenade launchers appeared randomly, or sometimes not at all.
The idea was to create a sense of dread as the players moved through this shadowy area even when there was no threat.
As players reached the end of the level the final VIP could be in one of two random positions with strong escorts.
Players could not actually enter the areas with the VIP,
so they had to use cover and attack from a medium distance in order to take him down!
Lost Memories...
Even though I did all my testing in release mode and set my language to the memory hungry Japanese character set,
a bug was found in which the game would crash if the FIRST STRIKE environment was played in networked Co-Op mode
in a different, less memory-intensive language.
After attempting multiple reductions of AI, scripts, and even art assets,
it was found that this crash would occur even if nothing was in the level.
Sadly, due to the layoffs there was no budget for engineering support to attempt a fix.
So these missions remain lost to history, but there is a silver lining.
In pushing the scripting system to create my encounters, I discovered a technique that allowed the reuse of AI squads.
This technique was used in all the EVAC missions as well as Zipper's next title,
UNIT 13.
Overall Contributions
The following is a simple "one-look" outline style list of everything I worked on in SOCOM 4 as a designer.
For more detailed information, please click the "Design Works" tab.
Level / Mission Design and Scripting
Instant Action / Co-Op
Countdown Espionage
Countdown Takedown
Fluid Dynamics Espionage
Fluid Dynamics Takedown
Leviathan Takedown (Polish and scripting updates only)
Turning Point Espionage
Turning Point Takedown
DLC: Leviathan Evac (Took over mid-production)
DLC: Turning Point Evac (Took over mid-production)
DLC: First Strike Espionage
DLC: First Strike Evac
DLC: First Strike Takedown
Campaign Stealth
Revelation (Took over mid-production)
Systems Design
Cover System
Design and implementation of Vault Slide feature
Completed cover markup passes on all environments by pre-Alpha milestone
Performed initial cover markup passes on all multiplayer maps
Best practices education on cover placement and markup for Art and Design