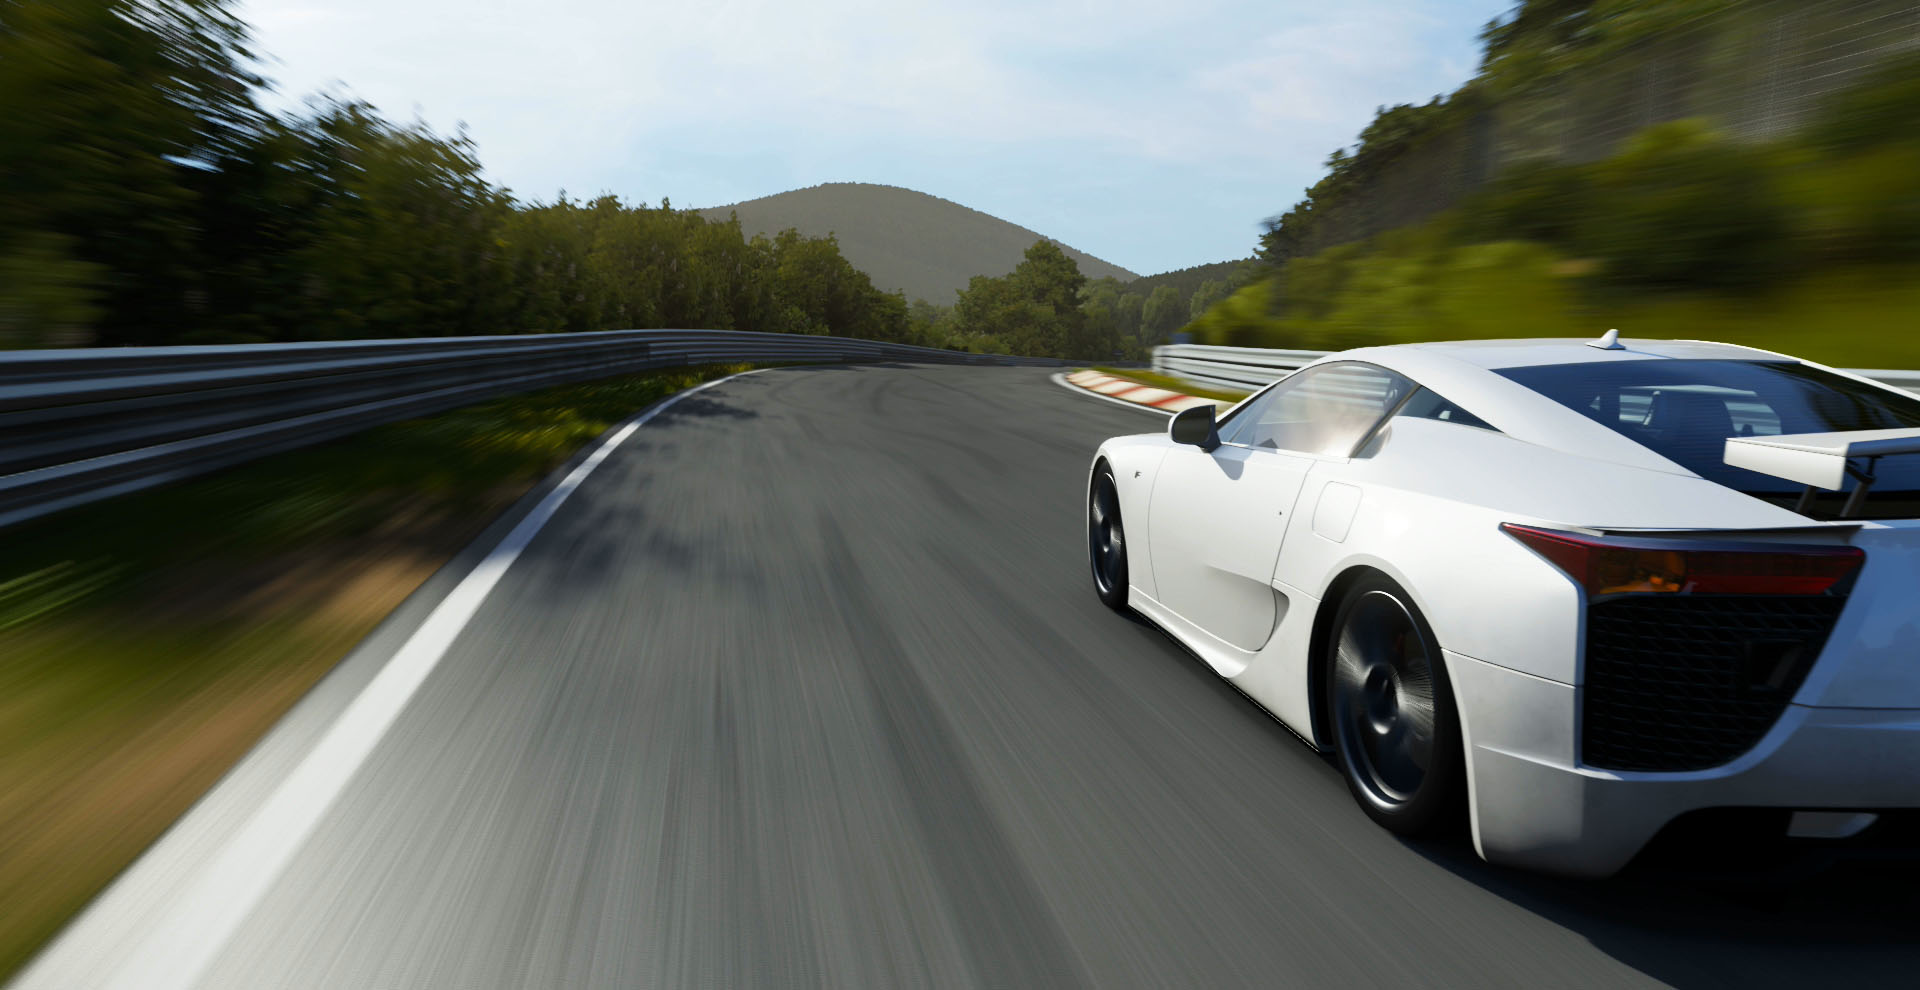
Serving as an exclusive day one launch title for the Xbox One,
Forza Motorsport 5 featured new tracks, unique social interactions, and Forzavista mode across its entire car list.
This gave owners of the new console all the Forza gameplay they loved on the previous generation console,
and helped to introduce them to the expanded possibilities of the next.
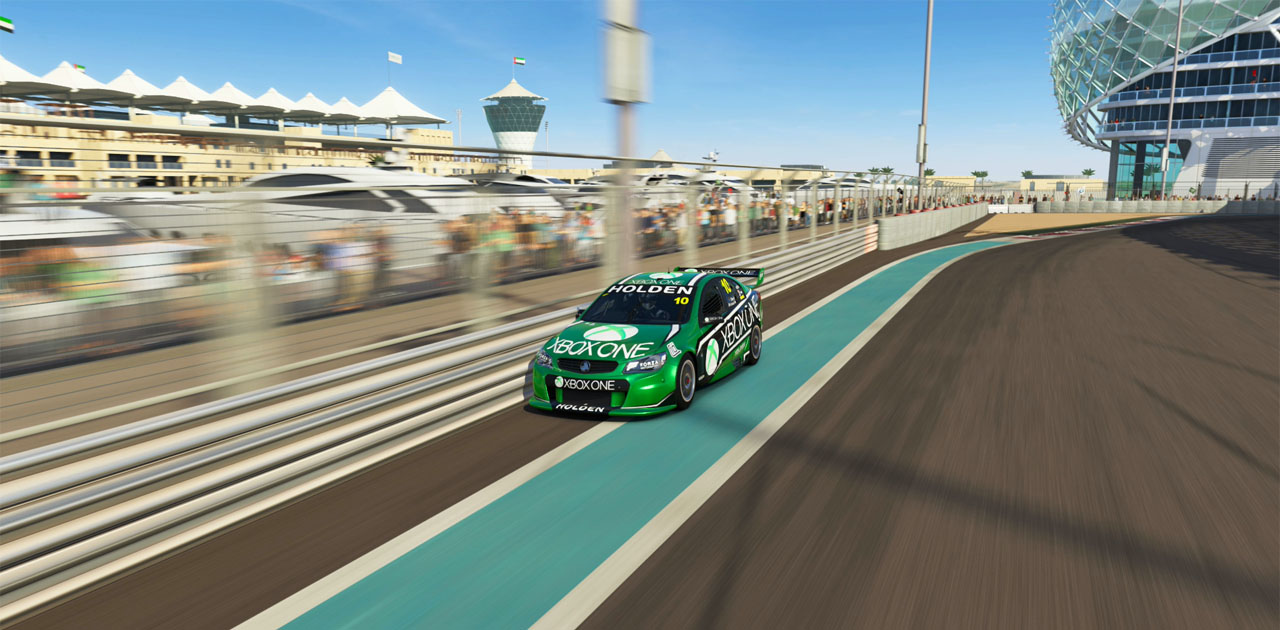
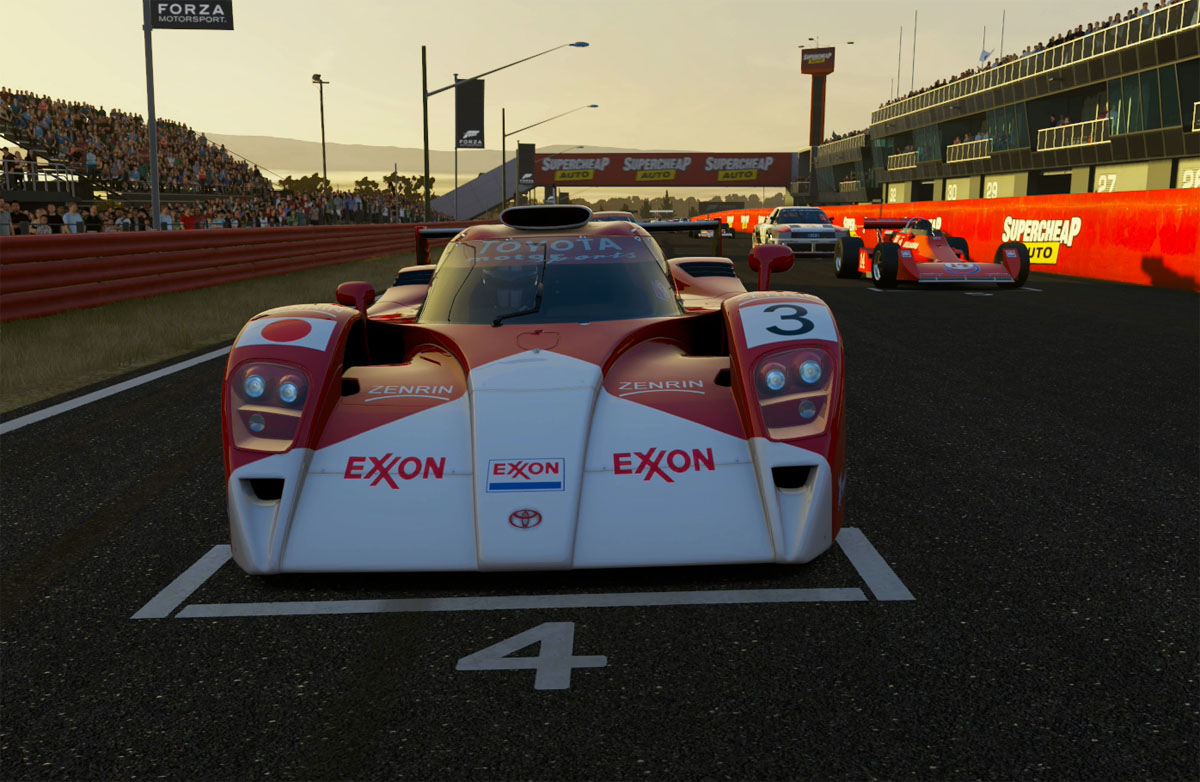
New original courses like Prague and the Airfield Test Track joined real world additions Yas Marina Circuit
and Mount Panorama (Bathurst) to give players 14 next generation tracks to choose from on launch day.
Many of these tracks featured multiple configurations, bringing the total of course variations to more than 40.
The Drivatar ushered in a new era of social racing, as the AI would take on the driving habits of players all over the world.
Unless they were communicating over voice chat, players might not know if they were actually racing a friend or that friend's Drivatar.
Rounding out the next generation overhaul, Forzavista tours were added to every car in the game.
This allowed players to explore countless dream cars as if they were their very own.
Forza Motorsport 5 Launch Trailer
Courtesy of Microsoft Studios
Five to One
Searching for a new job after the demise of Zipper Interactive proved much more difficult than I had expected.
Despite having made incredible contributions on two AAA titles as a designer, I was often overlooked on a chronological basis.
Thankfully the folks at Turn 10 saw the talent beyond the numbers and put me on the grid.
It was a tough race, but I claimed the checkered flag and landed a spot on their research and design team.
Systems Design Surface Types
Physics, photos, and particles, oh my!
A New Beginning
Although I had interviewed for a position involving car design, upon arriving at Turn 10
I was put in charge of the research side of track design due to my skills and previous experience.
There were many facets to track research, but they all led to the common goal of making each track in the game as accurate as possible.
A very large part of creating this realistic feel was rooted in the concept of surface types, which are a core physics component of tracks.
Scratching the Surface
Surface types are physics materials,
which is just a concise way of saying that they are a collection of data that is processed by the game's
physics engine. They make surfaces like asphalt feel like asphalt when driven on in-game.
Naturally, each surface type contained quite a few physics related data values, like friction or bumpiness.
In addition to physics data, every surface type also defined the following when driven on or collided with:
Which audio or sound effects to play
What, if any, particles to generate
What, if any, skid marks to generate
Whether or not to generate sparks upon a collision
How much vibration to send to the controller
Technically, my previous statement is not quite accurate, as surface types are never actually driven on.
Instead, they are assigned to the polygons that make up the driving surfaces in the game.
Adding a surface type to a polygon is commonly referred to as "tagging it with a surface type",
so I will use this language throughout the rest of this page.
Every driving surface in Forza Motorsport 5 has a surface type, so getting these right was a pretty big deal.
Thankfully, every surface type was fully tunable.
Surface to Surface
Previous generations of track designers had created and fine-tuned the surface types used in-game throughout
the development of the first four entries in the Forza Motorsport franchise.
There was no need to reinvent the wheel, or in this case the asphalt, concrete, gravel, etc.,
and so all the surface types from previous Forza Motorsport titles were imported into Forza Motorsport 5.
However, due to engine changes and the move to a new console some of this data was no longer accurate.
Bumpiness, in particular, was completely thrown off and had to be re-tuned on every existing surface type.
Thankfully, once this initial work was completed no further tuning was necessary.
Vibration, on the other hand, was a constant struggle.
Between global changes and new revisions of the controller coming in, vibration was all over the place.
Eventually, I was able to tune it to match the levels of vibration from Forza Motorsport 4,
but there were some improvements I would have liked to have made if there had been more time.
When compared with its predecessor, the number of unique surface types nearly doubled in Forza Motorsport 5.
Some of these were created to work with new track related systems, while a great many were needed for new tracks,
like Prague and Yas Marina Circuit.
Many of the new surface types were created during the track research process
when a real world surface was discovered that was not authentically represented by any of the existing surface types.
(Track Research is covered in the next category.)
In order to create a new surface type I needed to research the real world surface to determine its properties so that
I could translate them into game data.
About half of this was achieved by reading technical data sheets and performance reports published by tracks,
construction firms, and automobile manufacturers.
The remainder was completed by taking a known quantity, such as the performance of a polished car in the game,
and comparing it to the same car at the same spec driving on the new surface in the real world.
Finding this kind of reference often proved difficult,
but once I had obtained enough it was just a matter of using it to tune the new surface type
until the performance of both the in-game and real world cars matched.
Rainbow Road
A wonderful tool was present in the engine to help with surface type identification in the game.
It would render a specific color on top of the visuals for every polygon in the environment based on its surface type.
This tool also supported an opacity setting for the rendering of the surface type colors,
which allowed the visuals of the environment to be visible as well.
This made it a breeze for designers or testers to quickly fly around an entire track and identify all the places
where visuals and surface types did not match.
The initial color settings for this tool had been done well,
as surface types like grass appeared in solid green, while concrete appeared in shades of blue-gray.
Unfortunately, as more surface types had been added over the years, no one had given them new colors.
This resulted in about 30% of the surface types displaying the same color in this tool,
which made it impossible to use to identify many surface type tagging bugs.
To fix this I began by going through the entire list of surface types and evaluating the existing colors.
Any surface types with colors that made sense, like the aforementioned grass, retained their colors, while others changed.
I created a spreadsheet to group similar surface types into "families", track the colors I had already used,
and plan the new colors I would introduce.
As I added new colors to surface types I tested them on both PC and development kit to make sure that all the colors
could be easily distinguished from one another.
Once I was happy with the new colors, I updated the spreadsheet to include the RGB values of each color
along with the name of the surface type, its family, and any notes.
My changes restored the intended functionality to this great tool, and made it invaluable to any discipline doing work with surface types.
Failed Experiment
In an attempt to make certain surface types behave more realistically under special circumstances,
I ran a series of experiments using all the physics values I could tune.
While the results of these experiments did not render the ultra-realism under all conditions that I was hoping for,
they did expose some limitations in what could be achieved with surface types alone.
This set the wheels in motion for changes in Forza Motorsport 6
that allowed my successor and that game to reach greater levels of realism.
Team Effort
Art, Audio, and Design were often impacted by the addition of new surface types,
so it was very important to keep them in the loop when new surface types were introduced or related changes needed to be made.
In order to keep the information flowing I informed all disciplines of an existing document in which every surface type,
its purpose, its expected use, and many of its parameters were listed.
I maintained this document throughout the production of Forza Motorsport 5 and made sure that it always contained the latest information.
I also made it a point to talk with anyone else who needed to work directly with the file in which the surface types were stored.
If they were new to software development, I sat down with them and taught them how to resolve files in the source control system
to ensure that no one ended up overwriting anyone else's changes.
By keeping everyone informed and aware, they shared information with me on the kinds of changes they would typically make to surface types.
This allowed me to set up new ones with all the data these disciplines would normally add later already in place.
Audio, in particular, was very grateful for this, as they were never blindsided by my changes.
The audio lead made it a point to tell me that he mentioned my communication skills in the Forza Motorsport 5 post mortem
as one of the reasons track audio functioned as well as it did.
Level Design Track Research
Better tracks through research.
R&D = Research and Design
Most of my time during the production of Forza Motorsport 5 was spent researching the entirety of real world tracks
to ensure that their in-game representations were as accurate as possible.
This meant I had to go beyond the edges of the tarmac and identify all the surfaces that a player could potentially drive on,
select the applicable surface type or create a new one for these surfaces,
and note any issues where the visuals of the track did not match reality.
I was also told to go for complete accuracy when performing this research and design, but there was a catch.
With the exception of surface type creation and tuning, I would not actually be implementing any of my findings in game.
Artists would take my results and tag the track with the surface types I directed them to use,
so my first real task was to find a clear way to report my findings to them.
The "track pack" was the result of this and it began with the creation of a "top down map".
The Top Down Map
My predecessor had already completed the research on Sebring International Raceway and was in the process of creating
a small document to present to the artists.
This document contained track level images with areas in need of surface type or visual changes called out with highlights.
This was a great start,
but with the large number of track-wide surface type changes coming I realized we needed something more to serve as a reference.
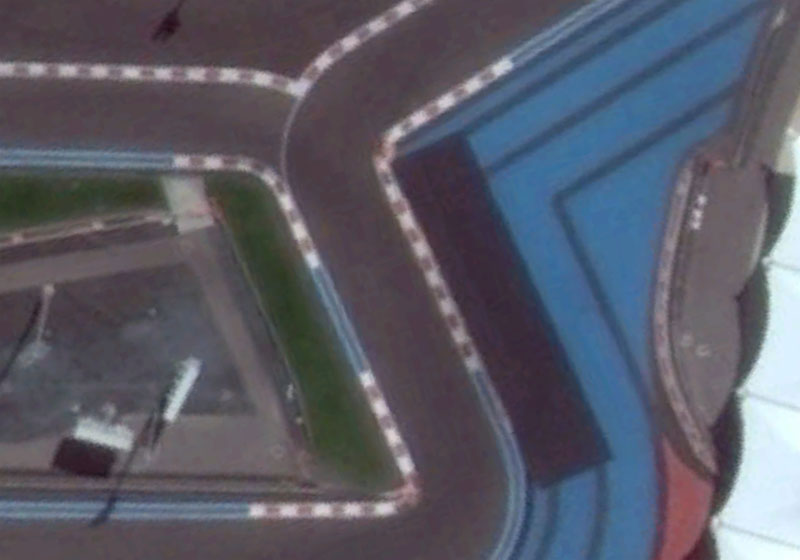
So I found the highest resolution and most up to date satellite map I could of Sebring and used Photoshop
to draw outlines around every drivable area that used a different surface type.
I then layered in colors for each unique surface type and added a key to show what surface type each color represented.
This was the creation of the first surface type top down map.
Thanks to its high resolution,
any user could zoom in on a turn or straight and see a clear view of what surface types were needed there,
while the entire map could still be glanced at in a meeting or on a monitor for quick reference.
Research Grant
The top down map had been well received by my boss and artists alike,
but since all of the research had been done for Sebring already
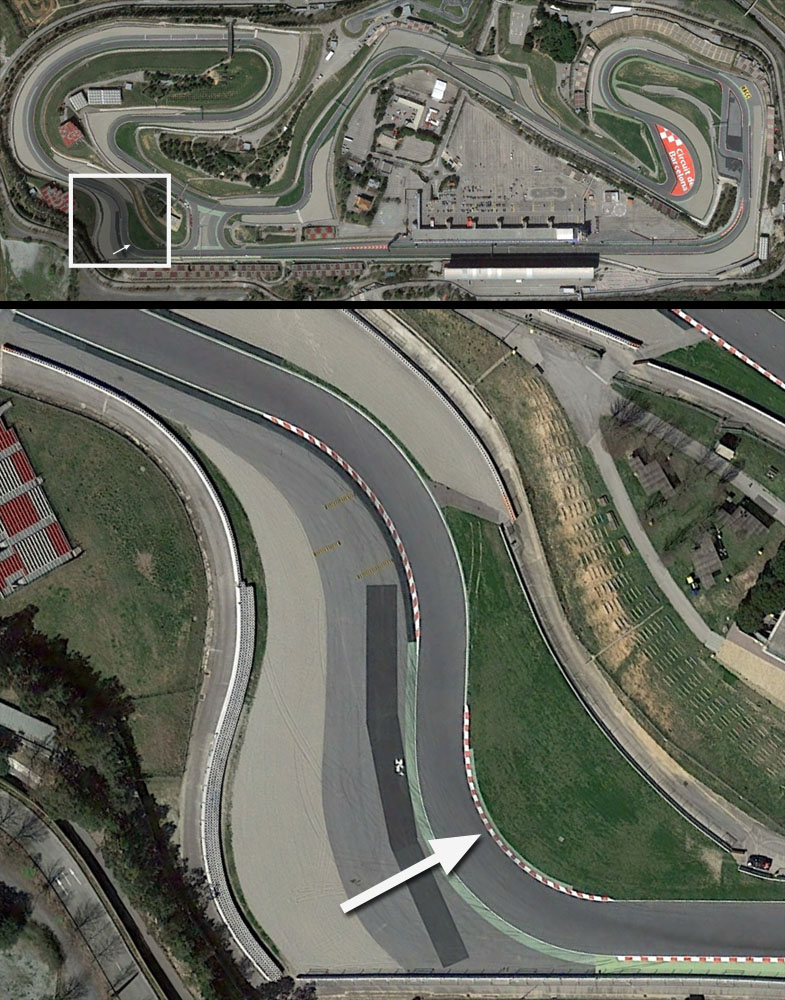
it was not until I began creating a top down map for Circuit de Catalunya (now known as Circuit de Barcelona-Catalunya)
that I got my first real taste of track research.
As with Sebring, the first step was to obtain a high resolution satellite map.
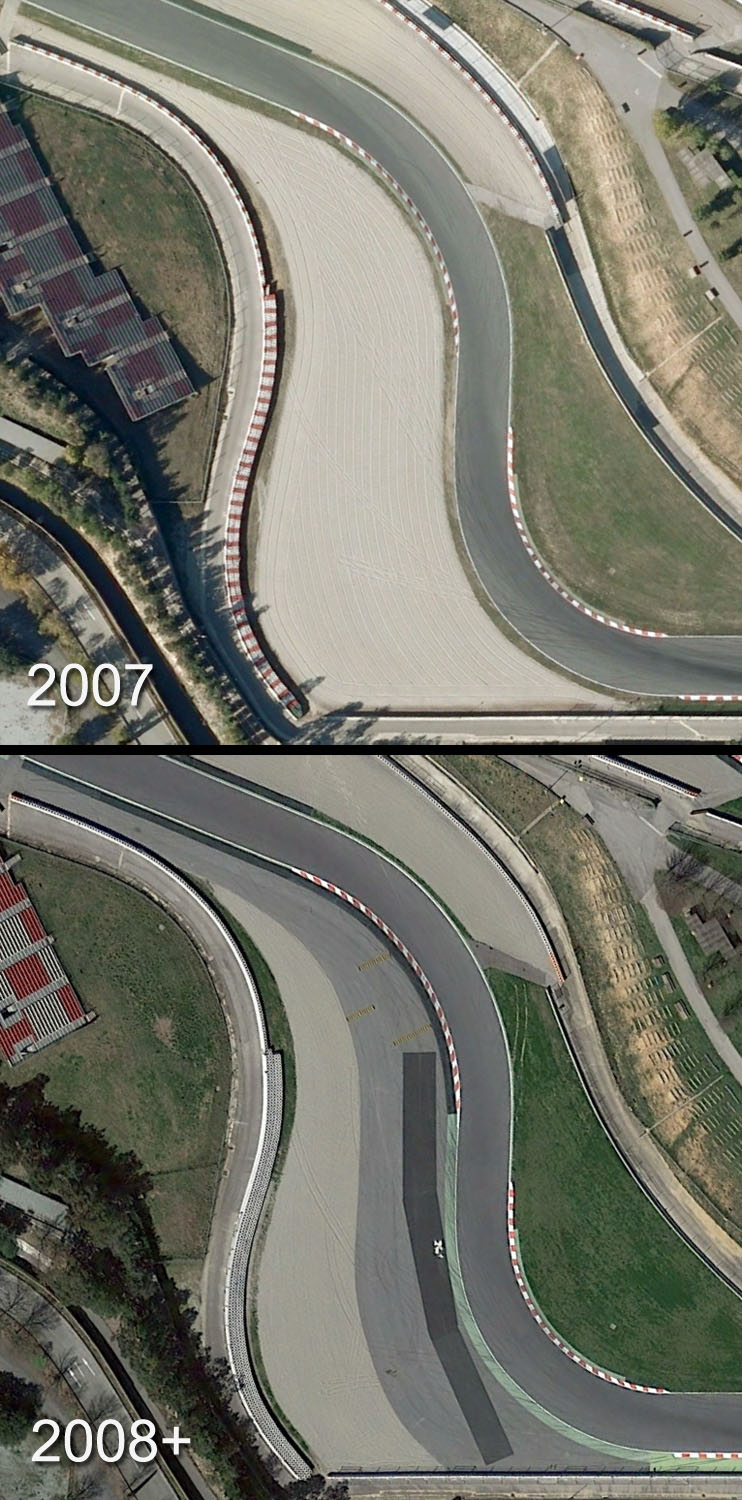
I needed to check the map carefully to ensure that it was accurate to the current layout and condition of the track.
Sometimes I would have to settle for a less than perfect map, but this meant I would have to call out any deviations,
so the better the map, the smoother the work flow.
With the map in hand, track research was commonly done using a combination of photos and video collected at the track
when it was laser scanned and footage from real races or amateurs with nice GoPro cameras and even nicer mounts to fill any gaps.
Just like with the satellite map, I had to be extra careful of the reference I used because tracks change all the time.
This was especially true with Catalunya, as the track had undergone some major improvements in recent years.
As I identified the driving surfaces, I outlined them on the top down map in Photoshop
and determined the most appropriate surface type to use for them in the game.
This identification of surfaces took the most time, as anything that was small in size or off the main racing line
might require multiple pieces of reference to identify with certainty.
And if one of these off line surfaces needed a new surface type then that would require even more reference,
as discussed in the previous category under "New Surface Types".
Not only were driving surfaces identified for anything that could be driven on,
but also for anything a car could collide with, like barriers or walls.
In order to reduce complexity, this data was not added to the top down map, but it was noted for later use.
Once all the driving surfaces were identified, matched to existing or new surface types, and outlined on the top down map,
I filled in the outlines for every unique surface type with the same color I had assigned it in the surface type identification tool.
I then added a key to identify the colors just as I had with Sebring.
In addition to the colored outlines, which would become known as "surface type markup",
I added a highlight around anything beyond the barriers of the track.
This allowed a user to "black out" the areas where a player could not drive, like grandstands, parking lots, buildings, etc.,
and focus in on the areas of the track where surface types would be needed.
Creating the top down map was the most challenging part of track research,
and it served as a fabulous reference for how an enitre track should be tagged with surface types.
However, through my experiences with Sebring I knew that just handing off the top down map was not enough.
Creating the Document
The completed top down map was a great reference for surface type tagging,
but since it contained the entire track it could be a bit overwhelming
and allow some surface type issues to fall through the cracks.
I revisted the idea of including a document with the top down map,
and looked over the document my predecessor had created for Sebring for inspiration.
It read largely like a collection of bug reports, as it focused on individual issues.
This had worked out for Sebring due to the small number of issues,
but when I considered larger tracks I knew I would have to come up with something more general.
Instead of focusing on each issue, I decided to focus on sections of the track.
These sections were commonly a turn or a straight, and were just the right size to not be overwhelming or overly detailed.
Pictures are said to be worth a thousand words, and in game development they most certainly give a bug or change request a thousand
times the chance of being fixed.
With this in mind, my first step was to create images for each section of the track.
Because my focus was on sections and not issues I decided top down images would be the best,
and began by cutting out images for each section that needed changes from the top down map.
Since I had cut my new images from the top down map they included all the surface type markup,
but I soon realized that these images were not that useful for showing off the changes that needed to be made in-game.
So I took screen shots of the same sections from the game with the surface type identification tool turned on,
but set to a very low opacity.
I then used Photoshop to align and scale the in-game screen shot to match the real world image cut from the top down map.
This allowed me to easily copy all the outlines and surface type markup from the real world image over to the in-game screen shot.
After making this copy I turned off all the surface type markup on the real world image.
Next I turned off the surface type markup for anything in-game that was already tagged with the correct surface type.
This reduced the amount of work I had to do adjusting the markup on the screen shot and put greater focus on the problem areas.
With the markup in place, text and arrows were added to the in-game screen shot
to show what surface type each area that had been called out needed to be tagged with.
I also added markup and callouts for any surface type change requests on barriers or walls.
Finally,
the real world image and in-game screen shot were ready.
I paired them together at the top of the page and added text to describe every surface type or visual change I had requested.
Ideally, this text was not necessary, but I provided it as a fallback just in case the callouts in the screen shot were ever
misunderstood.
With the format of an image, a screen shot, and text assembled for each section, the concept of the track document had come a long way.
But some sections were still a bit too complex and there were a few other issues I had not considered.
Improving the Document
Thanks to a few peer reviews and some personal reevaluation I made several changes to the document that improved it dramatically:
New Arrivals
Every new surface type created for the track was listed by name and internal implementation reference
in an indented list on the title page of the document.
This was just one of the many ways in which I attempted to inform others of new surface types.
Global Initiative
I factored some of the global surface type change requests out of the individual sections to reduce complexity of the screen shots
and the amount of work I needed to do to create them.
Out of concern for anything being missed, I generally limited the global callouts to things like the asphalt of the track itself,
but this still saved me quite a bit of time.
Each global callout would appear on the first page of the document in a combination of red and black text to make it more visible.
As time went on I began to treat the globals as their own sections, including a real world image, marked up in-game screen shot,
and descriptive text to make doubly sure such important changes were never overlooked.
Rumble Strip Separation
The marked up screen shots from the game could still get a bit complicated,
so I split any sections that contained rumble strips into two separate sections.
The first would contain the same image from the top down map with no markup as before,
but the screen shot from the game would only include markup for any surface type updates needed on surfaces that were not rumble strips.
The second section would still contain the image from the top down map, but text and arrows would be added to identify the rumble strips.
The in-game screen shot would then only contain markup for changes needed on the surface types of the rumble strips.
If any major visual or geometry change was required I also split this into its own section as well.
This was done in part to reduce complexity of the markup on the image, and also to draw more attention to these kinds of issues.
Callouts
The callout text originally used the full names of the surface types,
which sometimes made it challenging to create the images without overlapping or cutting off any of the text.
During an early presentation meeting an art lead suggested just using numbers instead of surface type names.
This was a great change, as it made the images easier to create and also removed any language barrier issues.
With these refinements in place, the format of the document was well established and it would prove itself time and time again as
an excellent compliment to the top down map.
The Track Pack
Together, the top down map and the document became known as a "track pack".
Once a track pack was completed I would call a meeting with everyone involved with the track (art, audio, test, and other designers)
to go over it and discuss any potential problems or risks I saw with the track, as well as address any feedback or concerns.
From this point on, the artists would implement the changes I had requested and the track pack was considered handed off.
Although the components of the track pack were essentially just a fancy paint by numbers,
they had been carefully designed to clearly direct artists to tag everything with the expected surface types
in order to bring the in-game tracks up to the Forza standard of authenticity.
They also served another very important purpose:
they were the design specification that test would use to create test cases and perform surface type testing against.
Two additional tasks would become part of the track pack during production, and they are discussed in the next category, "DRIVING AND LINES".
Penalty Boxes
During the research and track pack creation phase I also spent some time looking into where professional racers
would commonly push the boundaries of tracks. Some might call this cheating, others might call it good driving.
As I identified these areas I made change requests to several systems in order to make these areas of the course safe for players
to drive on without getting a "dirty lap" and invalidating their lap time.
Doing this for real tracks was very easy,
as footage is readily available for all the major racing series supported in the real world by tracks featured in Forza Motorsport 5.
But with fictional tracks it required a bit of creativity.
I ended up bringing my own personal Xbox 360 and copy of Forza Motorsport 4 into the office
and watching the replays of the drivers in the top positions on the leaderboards to see the places where they were not taking an ideal line
to avoid a dirty lap.
I noted these locations and made similar change requests to the penalty systems in order to let the players drive like professionals would.
Fictional Research
While I couldn't truly research fictional tracks, they still had track packs created for them.
The main purpose of this was to call out any surface type/visual mismatches and ensure that all fictional tracks
were using the latest surface types to match physics system changes.
Thanks to the lighter workload,
I was given the opportunity to propose changes and additions to the fictional tracks
that would make them feel more realistic when creating the track pack materials.
Based on all I had learned and observed at real race tracks, I suggested things such as locations to insert grandstands,
rumble strips, and safety barriers.
Unfortunately, due to the aggressive schedule of Forza Motorsport 5 none of my suggestions were implemented.
Sharing the Load
For a brief period I had an assistant on my team to help with the creation of track packs.
He came from a background in racing, so I spent extra time helping him to understand the processes and tools we used in the studio.
Just as he started to get good at producing track packs, he was offered a once in a lifetime opportunity
and had no choice but to put in his notice.
After his departure I debated requesting a replacement,
but after considering the time it would take to conduct interviews and ramp a new person up, I decided to continue on alone.
Standardized Testing
As I continued creating track packs, surface types,
and other content I took a little time to look at all of the tracks that I had already delivered track packs on.
Much to my dismay,
I found that quite a few of the surface type changes I had requested had not been made on several of the tracks,
resulting in a great number of bugs with both surface type mismatches and incorrect visuals.
I called a meeting to find out what had happened and learned that Test
had not included surface type testing in their testing or test plan, and did not have any resources to dedicate to doing so.
So I stepped up and spent the next few weeks entering nearly 500 bugs on surface type and visual issues on all the tracks that were test ready.
This number would have been higher, but I was asked to stop entering "minor" issues midway through.
After this crisis occurred,
I worked much more closely with the artists on tracks after delivering a track pack to make sure it never happened again.
Sometimes I would even go so far as to sit with the artists and walk them through
the implementation of the changes I had requested in the track pack.
AI Design Driving and Lines
Providing guidance to both players and AI.
New Challenges
Two additional tasks were made a part of the track pack delivery midway through production:
As the track designer, I also determined the racing line for many of the tracks.
This was done through a combination of research and racing knowledge.
For each track I obtained first person videos of the best professional racers doing qualifying laps on the track.
When searching for reference videos I always tried to find ones that showed the hands of the driver.
This way I could learn the exact moment when they began to turn in order to generate the most accurate line possible.
Once I handed off a racing line proposal another designer would take a look at it to make sure that it was valid.
Then it would be put through special processing to convert it to data so that it could be added to the game.
Slot Racing
Once the racing line was determined, I next created maps showing the general areas of the track that the AI drivers should use.
This was designed to keep the AI from driving erratically,
but the Drivatar system can offset this because if a player drives badly then their Drivatar will do the same.
Both of these tasks needed to be completed for every variation of a course,
and were sometimes requested to be handed off before beginning work on the top down map of a track pack.
In the Pits
The pit lane of each track with a pit zone featured its own driving line,
which was commonly created by the artists when the track was made.
I would use this line to set the points at which AI would take over and slow a player's car as they entered the pit lane,
and the point at which the AI would return control to the player as they exited the pits.
If I found that the driving line for a pit zone just didn't work, I would mock up a new one and take it to the artists for implementation.
Then I would retune the AI takeover and release points until the pits functioned smoothly and did not cause any collisions or dirty laps.
Take a look at the following video to see how the tuning of the pit lane driving line and AI takeover regions allows the system
to smoothly get both slow and fast cars through the pits without incident:
Content Design Raceday Polish
All the little things that make a race feel complete.
Back in the driver's seat
Although I enjoyed researching tracks, I was usually giving instructions to others and not implementing anything myself.
So I was quite pleased when my boss came by with several implementation tasks from the gameplay side of tracks
for me to perform on every variation of every course.
Scrutineering
Every one of these tasks depended on one important thing, the location of the start-finish line.
If the start-finish line was not in the correct position, then all of my new tasks were blocked.
So I started off by checking their locations in every possible course variation in the game and entering blocking bugs as necessary.
At the same time I was checking the start-finish line, I also took a look at the artistic representation of the starting grid.
If this did not match real life, or was missing, one of my new tasks would be blocked and I would enter another blocking bug to get it fixed.
The final test was to make sure every course variation followed the correct layout.
For the most part everything was correct,
but I discovered a single case where a small section of one variation was using the Moto GP version of a turn instead of the F1 GP version.
The course variation was billed as the GP circuit,
so I produced a great deal of reference showing the error and entering a blocking bug
that spared Forza Motorsport 5 some serious embarrassment!
Once all my testing was completed, I could begin any tasks that were not blocked.
Start Grids
This task was fairly straightforward, as I simply needed to align cars to the start grid for each new course variation.
However, to get it just right I called upon several of the skills that would lead to my transfer to Forzavista design in the future.
Since all cars are different shapes, I started by finding the largest, most rectangular shaped car I could.
Something like the GMC Vandura would have been perfect, but this car wouldn't exist in-game for another year!
After finding a suitable car, I generated values for the first grid position by first setting the rotation of the car
to match that of its grid marker.
Next, I centered the car within the sides and placed the front bumper just behind the front of its grid marker.
If the course variation had no grid markers I would do some research to see if any real events used this variation
and match that layout if one existed, or space the cars evenly if there was none.
For the purposes of rotation I would use the sides of the track to ensure that the cars were facing straight ahead.
I repeated this process until I had values for the first two rows of the grid.
After that I used math to calculate out the position values for the third row of the grid
and tested to see if these cars looked aligned with these values.
If everything looked good I would continue using math to finish gathering values for the grid positions.
Unfortunately, if the track started to curve then position and rotation values would need to be fine-tuned by hand for every grid position.
As a happy accident the track I was given to look at as example for generating and saving the start grid values had position data for 24 cars.
So I generated data for 24 cars as I completed this task on every unblocked course variation.
While this many start grid positions were not needed for Forza Motorsport 5,
they were in Forza Motorsport 6 and I had saved the future track design team a lot of time.
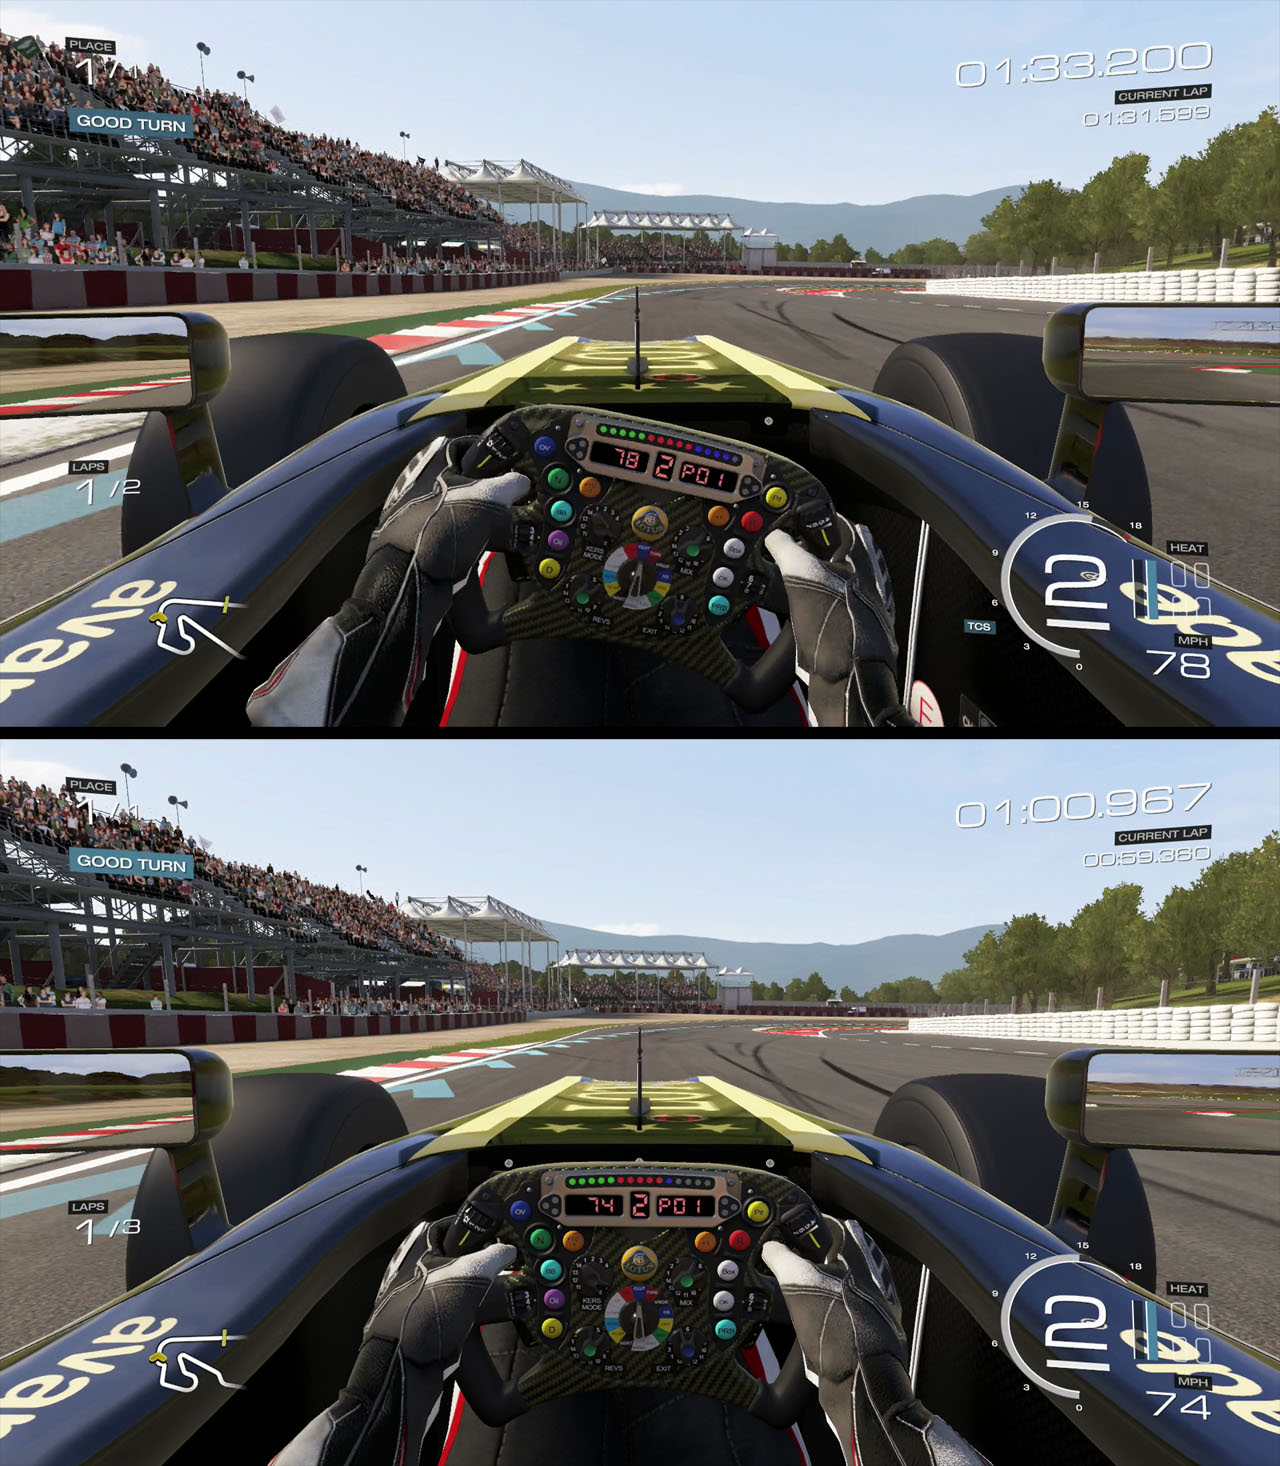
Race Feats and Sections
Forza Motorsport games have long featured "race feats",
which are the display of a grade for things like how well a player has taken a turn or passed another car.
Of these feats, the grading for turns and drifting were powered by systems that relied on designer placed markup.
Perfect Turns
The first step in creating markup to power the "Turn" grading system involved looking at the entire course variation
and evaluating how or if the turns would be graded.
In the case of very light bends that did not require any skill to navigate there would be no grading,
while turns that flowed into each other and really needed to be attacked together would be grouped,
and the player's performance through the entire series would be graded.
Once I knew where I would place the markup, I determined the apex of the turn and created a region around it.
In the case of grouped turns or multiple apex turns creating this region would get a bit more complicated,
but through testing and tuning it would be made to work.
After I added the markup I tested this grading with a base car to ensure that everything felt right,
and made changes if it did not.
Then I moved on to testing with multiple cars and fixed any problems that I found before checking everything in to source control.
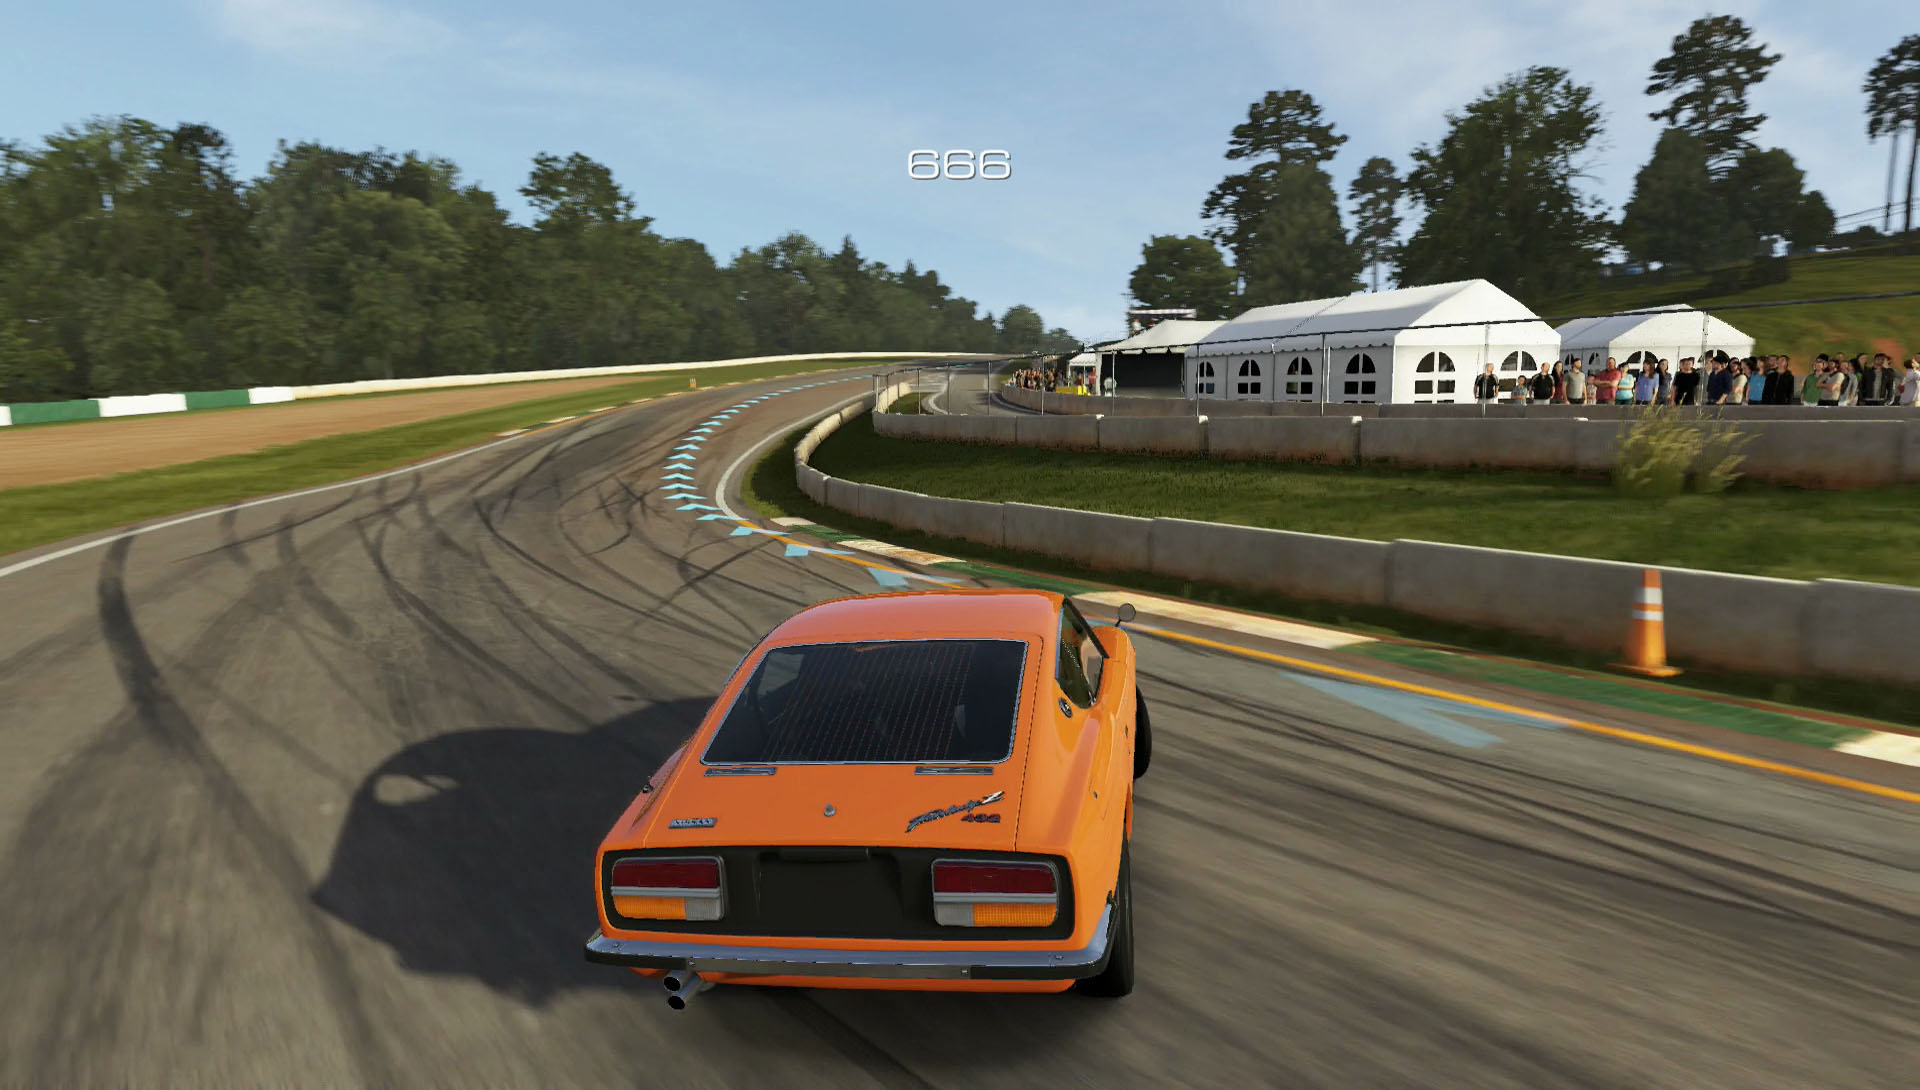
Drift Zones
Setting up the drift scoring regions was even easier, as I simply needed to markup the start and end points of each zone.
But I didn't stop there.
I had looked into feedback on drifting in Forza Motorsport 4
collected from internal and external sources and found that everyone was in agreement on one thing:
the areas where drift points could be scored were too small.
So I enlarged the drift zones throughout all the tracks in the game and enclosed turns that flowed into each other
into a single zone to allow the drift masters more chances at higher scores.
I actually spoke to the design lead about allowing drift points to be scored around the entire track,
but there was concern over exploiters taking advantage of this.
Still, I think my changes helped to make drifting in Forza a bit more fun!
Split Points
Split Points were not race feats as they did not generate a grade,
but they were positioned in the same manner as the turn grading regions and drift zones,
so I implemented and tuned them at the same time.
These points served to divide the track into sections, and would trigger a display of the section time when driven through.
I had wanted to position these points in the same places where real world tracks did so that players could
compare their section times against the performance of real racers.
Unfortunately, there was a design specification in place for positioning these points and I was told to use it instead.
All was not lost though.
By using the old design spec Forza Motorsport 5's split points were consistent with those in Forza Motorsport 4.
And my successor was a big fan of racing, so I made sure to explain to him why I had placed the split points as I did on real world tracks.
Due in part to his passion,
and the more relaxed schedule of Forza Motorsport 6, he was able to successfully convince the leads
to allow split points to be placed to mirror real world section markers.
All the position data of the markup for race feats and split points was not based off an absolute position within the track,
but was instead relative to the position of the start-finish line.
This is why I could not begin any work on any of this markup until the start-finish line was in the correct spot.
This had the side effect of making it so that I had to place unique markup for everything on each individual course variation,
and with the exception of split points I could not just copy position data values from one variation to another
for many of the shared areas.
Thankfully, this was not a problem for a person with the power of math at their side.
I just had to calculate offsets for the parts of a course variation that varied from the main course layout
and apply these to the position data to make it so that turn grading regions or drift zones
would be in the same spot for all shared sections of the course variations.
Naturally, I had to test my work, but correctly calculated numbers never lied or led me astray.
I looked into some of the older courses and found that there were inconsistencies between the position
of this markup between course variations,
so I calculated offsets and corrected all of the markup in the same manner so that no matter what course a player was on in the game,
if they saw a turn grade appear at a certain point when coming out of a turn then it would appear at the exact same point
if they came out of the same turn on a different course variation.
Contract Design Handover
Passing the track research and design torch.
Everything Counts
Unfortunately, a growing number of studios use contracts of an arbitrary length
that are not determined in any way by schedules or ship dates.
This results in talent leaving studios at odd times,
and in my case my contract was up about one month before Forza Motorsport 5 was scheduled to ship.
I knew this was coming, so I worked as hard as I could to not leave my successor in a bad way.
With the game nearing ship my successor and I were extremely busy,
so we did not have a lot of time to go over track design and research together.
Still, we met when possible over my final few weeks and I walked him through the creation of track packs and implementation race feats.
Final Push
It was during these meetings that I learned that my successor would not only inherit my responsibilities,
but also had to continue doing his own job.
I had everything ready track-wise for shipping and day one tracks,
but additional DLC was coming up and a few pieces were starting to come online.
In order to help him out as much as possible, I completed the following DLC track design work before my time was up:
Long Beach
Created Racing Line and AI Usage maps for all course variations
Set up start grids, placed turn grading regions, drift zones, and split points for all course variations with correct start-finish lines
Created Racing Line and AI Usage maps for all course variations
Created the track pack document on the Nordschleife section of the course
Entered bugs on all start-finish line issues
Entered bugs on course layout issues
Entered bugs on pit lane driving line issues
Road America
Completed about 20% of the top down surface type map creation
Created Racing Line and AI Usage maps for all course variations
Set up start grids, placed turn grading regions, drift zones, and split points for all course variations with correct start-finish lines
Entered bugs on all start-finish line issues
Entered bugs on course layout issues
The track pack document for the Nordschleife was the last thing I was able to finish, and ended up being over 240 pages long.
My successor still appreciates that I completed and handed off this document to this day!
Last Hurrah
On my last day of work I stayed in the office until almost 3 A.M. writing a track research and design document.
It was 10 pages long when I finally called it a night, and served as a good start,
but had just barely scratched the surface of all the responsibilities I had.
So I spent the next week completing the document from memory at home.
It expanded from 10 pages to 46 and gave a much better overview of all the tasks involved in track research.
I was no longer employed and thus unpaid for this work, but it was the right thing to do for my successor and the players.
Post Mortem
Throughout my time on Forza Motorsport 5, I estimate I worked more than 400 volunteer hours.
In that time I completed all research on 9 of the 14 shipping/day one tracks,
trained an assistant and supervised the research on two of the remaining tracks,
created driving lines, AI usage maps, tuned pit lanes,
and added or polished race feats and split points for 13 of the 14 shipping/day one tracks and many of the DLC ones,
in addition to all surface type creation, maintenance, and a lot of testing.
Unfortunately, in spite of my efforts, the ticking clock of the fixed length contract saw me laid off just three weeks from ship.
Although I was still in good standing with Turn 10,
the expiration of my contract also made it so that I could not attend any ship parties with the car research team,
and I did not receive a copy of the game.
Despite this poor send off I am very proud to say that almost all of my work still stands as of today.
And happily others won't ever have to go through what I did,
as the track research team was expanded to four people for
Forza Motorsport 6.
Overall Contributions
The following is a simple "one-look" outline style list of everything I worked on in Forza Motorsport 5 as a designer.
For more detailed information, please click the "Design Works" tab.
Systems Design
Surface Types
Updated surface type data used for every driving surface in the game to work with new engine
Created and tuned new surface types to match unique driving surfaces
Maintained and created detailed documents on surface type uses and parameters
Track Design
Track Research and Design
Bernese Alps (6 course variations)
Track Pack Materials - Top Down Map, Document, Racing Line, and AI Usage Map
Tuning of Pit Takeover and Release parameters
Tuning of Start Grid, Race Feats, and Split Points
Deformable Tire Wall Research
Circuit de Catalunya - Day One (3 course variations)
Track Pack Materials - Top Down Map, Document, Racing Line, and AI Usage Map
Tuning of Pit Takeover and Release parameters
Tuning of Start Grid, Race Feats, and Split Points
Deformable Tire Wall Research
Circuit de Spa-Francorchamps (1 course variation)
Track Pack Materials - Racing Line and AI Usage Map
Addition and tuning of Pit Takeover and Release parameters
Addition and tuning of Start Grid, Race Feats, and Split Points
Deformable Tire Wall Research
Indianapolis Motor Speedway (2 course variations)
Track Pack Materials - Top Down Map, Document, Racing Line, and AI Usage Map
Tuning of Pit Takeover and Release parameters
Tuning of Start Grid, Race Feats, and Split Points
Deformable Tire Wall Research
Le Mans Circuit de la Sarthe (3 course variations)
Track Pack Materials - Top Down Map, Document, Racing Line, and AI Usage Map
Tuning of Pit Takeover and Release parameters
Tuning of Start Grid, Race Feats, and Split Points
Deformable Tire Wall Research
Long Beach - DLC (3 course variations)
Track Pack Materials - Racing Line and AI Usage Map
Addition and tuning of Start Grid, Race Feats, and Split Points (Only on some variations)
Mazda Raceway Laguna Seca (1 course variation)
Track Pack Materials - Racing Line and AI Usage Map
Tuning of Pit Takeover and Release parameters
Tuning of Start Grid, Race Feats, and Split Points
Deformable Tire Wall Research
Mount Panorama Circuit (1 course variation)
Track Pack Materials - Top Down Map, Document, Racing Line, and AI Usage Map
Addition and tuning of Pit Takeover and Release parameters
Addition and tuning of Start Grid, Race Feats, and Split Points
Deformable Tire Wall Research
Nürburgring - DLC (3 course variations)
Track Pack Materials - Document (Nordschleife section only), Racing Line, and AI Usage Map
Prague (4 course variations)
Addition and tuning of Pit Takeover and Release parameters
Addition and tuning of Start Grid, Race Feats, and Split Points
Road America - DLC (5 course variations)
Track Pack Materials - Racing Line and AI Usage Map
Tuning of Pit Takeover and Release parameters (Only on some variations)
Tuning of Start Grid, Race Feats, and Split Points (Only on some variations)
Road Atlanta - Day One (2 course variations)
Track Pack Materials - Top Down Map, Document, Racing Line, and AI Usage Map
Tuning of Pit Takeover and Release parameters
Tuning of Start Grid, Race Feats, and Split Points
Deformable Tire Wall Research
Sebring International Raceway (3 course variations)
Track Pack Materials - Top Down Map, Racing Line, and AI Usage Map
Tuning of Pit Takeover and Release parameters
Tuning of Start Grid, Race Feats, and Split Points
Deformable Tire Wall Research
Silverstone Racing Circuit (3 course variations)
Track Pack Materials - Top Down Map, Document, Racing Line, and AI Usage Map
Tuning of Pit Takeover and Release parameters
Tuning of Start Grid, Race Feats, and Split Points
Deformable Tire Wall Research
Top Gear (7 course variations)
Track Pack Materials - Top Down Map, Document, Racing Line, and AI Usage Map
Tuning of Start Grid, Race Feats, and Split Points
Deformable Tire Wall Research
Yas Marina Circuit (5 course variations)
Track Pack Materials - Top Down Map, Document, Racing Line, and AI Usage Map
Tuning of Pit Takeover and Release parameters
Tuning of Start Grid, Race Feats, and Split Points